Star News


How to find a break in hidden wiring. How to find a wire break in the wall: an overview of ways to detect and fix a break
 Probably, each of us is familiar with the situation when electricity suddenly disappears in the house, and not through the fault of utilities, but due to problems with electrical wiring.
It is good if the family has a professional electrician. But what if there is no such specialist? How to find a wire break, especially if it did not occur in an open area? Many experts say that it will be very difficult to do this without a professional electrician and a locator (special tool). However, you can try and fix this problem on your own.
Preparatory stage
Before you get started, prepare the necessary tools. So, you will need:
- Tester.
- Screwdriver-indicator.
- Non-contact indicator of a hidden electrical wire. Please note that sometimes a simple proximity indicator is built into an indicator screwdriver. However, for such a tool to work "perfectly well", make sure that there are no other metal nodes in the wall under study, except for electrical wiring.
- Regular screwdriver.
- Knife with insulated handle.
- Pliers.
- Insulating tape.
A step-by-step guide to finding a broken wire
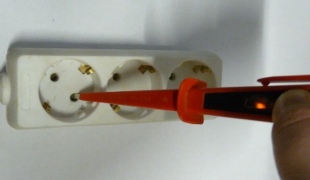
Step one. Determine which conductor is damaged. It can be either a phase or a "zero" wire. "Probe" with an indicator screwdriver the contacts of a non-working switch or outlet. The energized switch must have one contact in the off position, and both contacts in the on position. There should be only one contact in a live socket. The presence of a "phase" indicates that your "zero" conductor is broken.
If the accident occurred in a hidden section of the electrical wiring, then it is better to look for the answer to the question of how to find a broken wire together with a professional electrician, because you yourself are unlikely to be able to localize the problem area.
Step two. If you have access to the entire section of the electrical wire, then using a tester, you can find the damaged area. This is done according to the following scheme:
- On the switchboard turn off the voltage.
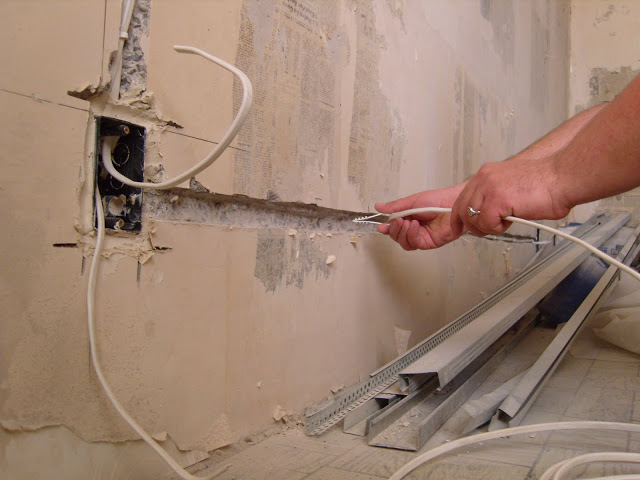
- Make two notches. The first - near the exit of the wire from the junction box, cut the insulation, exposing the metal of the conductor, the second - do the same procedure about a meter from the first "notch".
- Measure the resistance in the "highlighted" area. A small value indicates that there are no discontinuities in this section.
- Repeat the same operations on each meter of electrical wire until the tester shows no resistance.
Step three. If the tester shows that there is no resistance in a certain area, then this means that you have found a damage site. We perform an operation with “notches” on the “revealed” area, reducing the distance between them in order to find the point of damage as accurately as possible. According to experts, this technique is optimal when searching for a wire break.
If the point of damage to the phase conductor is in a brick or concrete (without metal fittings) wall, then you need to use a non-contact indicator of hidden wiring. As a rule, the wires from the junction box are laid in a certain pattern (horizontally or vertically with a right angle turn), so tracing the “path” of the electrical wiring will not be difficult for you. Further along the wires, lightly touching the wall, move the indicator, which will inform you about the place of the break with a certain signal.
Important information
Be sure to insulate all areas where there are bare wires after completing the wiring repair. Also remember that working with electricity does not tolerate carelessness and frivolity. Be careful and attentive. Before starting work, do not be lazy and once again make sure that the electricity is turned off. Although, of course, it is better to entrust the work with electricity to experienced professionals. Have you changed your mind yet? Do you want to find a broken wire yourself? Well, you have the theoretical information. Get to work!. Stay with us!
How to find a broken wire in the wall, we'll figure it out in detail. This is a fairly common problem that almost everyone has encountered.
At first glance, it is quite difficult to solve, and it will be difficult to eliminate it with your own hands, but this is not so.
After all, to find and fix the problem, there is no need to call a professional electrician. In most cases it is sufficient to have school knowledge about electric current and voltage indicator.
Before you find a broken wire in the wall, you should prepare all the necessary tools. This does not require any special equipment, and you will surely find everything you need at home.

So:
- Two-pole voltage indicator with the ability to determine the circuit. But it's like the perfect fit. If desired, you can get by with a regular screwdriver - an indicator and a tester.
- Non-contact voltage indicator. This is perhaps the only thing that you may not have at home. But its cost is not very high, and even for the best models the price varies up to 1000 rubles. Yes, and at home, this thing is indispensable.
- Pliers, the handles of which are made of a dielectric material.
- A screwdriver whose handle is made of a dielectric material.

In what cases are they looking for hidden wiring in the wall
Before you find hidden wiring in the wall, you should decide on the purpose of this action. If you just want to hang a picture or nail a shelf, but are afraid of getting caught in the electrical wiring, then this is one option.
If you need to find the wiring when looking for damage, this is completely different:
- If you need to hang a picture, then the non-contact voltage indicator will easily indicate its location to you with an accuracy of 10 cm. To do this, we use its property to light up in red when close to live circuit sections. That is, in places where it glows red, electrical wiring is located.
Note! When looking for wiring coming from the switch, be sure to turn it on. After all, according to the "PUE", a single-phase switch must open the phase wire. That is, when it is in the off position, there will be no voltage in the rest of the circuit to the light bulb. And accordingly, a non-contact voltage indicator will not be able to find it.
- But if you need to know how to find wiring in the wall when looking for damage, then this is a completely different question. To answer it, you should know that two wires are used to wire the 220V network.
One of them is phase, and the second is zero. And if it is quite easy to find the place of a phase wire break, then you will have to tinker to find the place of damage to the neutral wire.
Determining a broken wire
To determine which wire is damaged, we need a voltage indicator or an ordinary screwdriver-indicator:
- If we have voltage on one of the outlet terminals, then the neutral wire is most likely damaged.
- If there is no voltage on one of the outlet terminals, then the damage is in the phase wire.
- Another option is when you have voltage at both terminals of the outlet. But this is extremely rare and we may describe this case in one of our next articles.
- If our lighting wiring is damaged, then you first need to determine the damaged area. To do this, it is necessary to check the presence of voltage on the phase wire coming to the switch.
- There is either no neutral wire here at all, or it passes in addition to the switch (this is quite rare). If voltage comes to the switch, then there is a break in another section, if it does not come, then in the section from the junction box to the switch.
- We do a further check for the presence of voltage on the cartridge of your lamp. To do this, do not forget to turn on the switch. If there is no voltage, then there is a break in the section from the switch to the lamp, if there is, then most likely you have a break in the neutral wire.
Looking for a damaged wire
Method for finding damage to the phase wire
Wiring can be of two types: external and hidden (internal).
Finding the fault location for outdoor wiring is quite simple:
- In 80% of cases, a simple visual inspection reveals the location of the damage.
- If this did not help or several possible damage points were identified, then after removing the voltage from the wire, you can feel it. This almost always allows you to accurately determine the location of the damage. If this does not help, then we use the most time-consuming, but at the same time simple method.
- If you have a non-contact voltage indicator, then we simply lead it along the wire from the junction box to the outlet or switch. The place where it stops glowing is the point of damage.
- If you do not have a non-contact voltage indicator, then we remove the voltage from our section of the wire and make a small incision on it, sufficient to touch the live parts with the indicator.
- Then we apply voltage and check its presence at the incision site. So, gradually narrowing the search area, you will determine the location of the damage.
But to answer the question: how to find a break in hidden wiring, you cannot do without a contactless indicator.
- To do this, as in the case of external wiring, we simply lead them along the intended location of the wires. In the place where it stops glowing, you should perform several circular movements in order to determine if you have deviated from the place where the wire is laid. If not deviated, then the place of damage is here.
Method for finding the place of damage to the neutral wire
With the search for a break in the neutral wire, everything is a little more complicated, and many sites advise not to tempt fate and entrust this matter to professionals. After all, how to find the wiring in the wall if not a single device reacts to the neutral wire?
The answer is really simple. This means that it should be made phase, the damage of which we already know how to determine. But I'm warning you! This should be done only if you really remember at least the school cycle for alternating current.
If not, then don't even read any further. After all, the electric current has no smell, no color, no sound, and it will not warn of danger. And the consequences of contact with him can be very deplorable.
We will reduce the further answer to the question of how to find electrical wiring in the wall if the neutral wire is damaged, to a step-by-step instruction:
- Turn off all electrical appliances in your home. This is especially true for devices for which the location of the plug in the socket is important, some modern chandeliers and the like. We do this solely for security purposes.
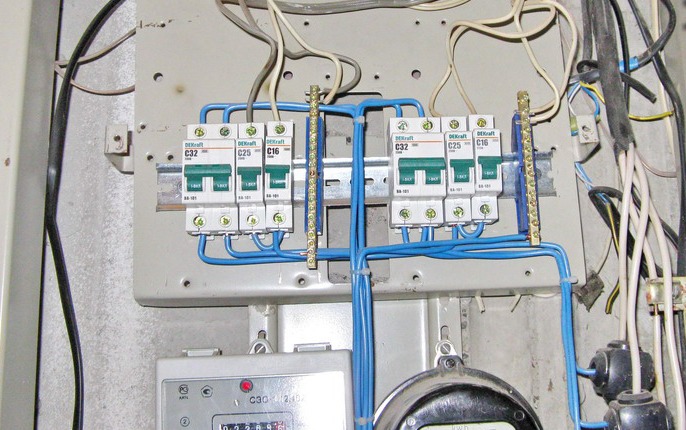
- Determine the source of the damaged area. It is better that it be a circuit breaker, not a junction box.
- Turn off the introductory machine to your house or apartment.
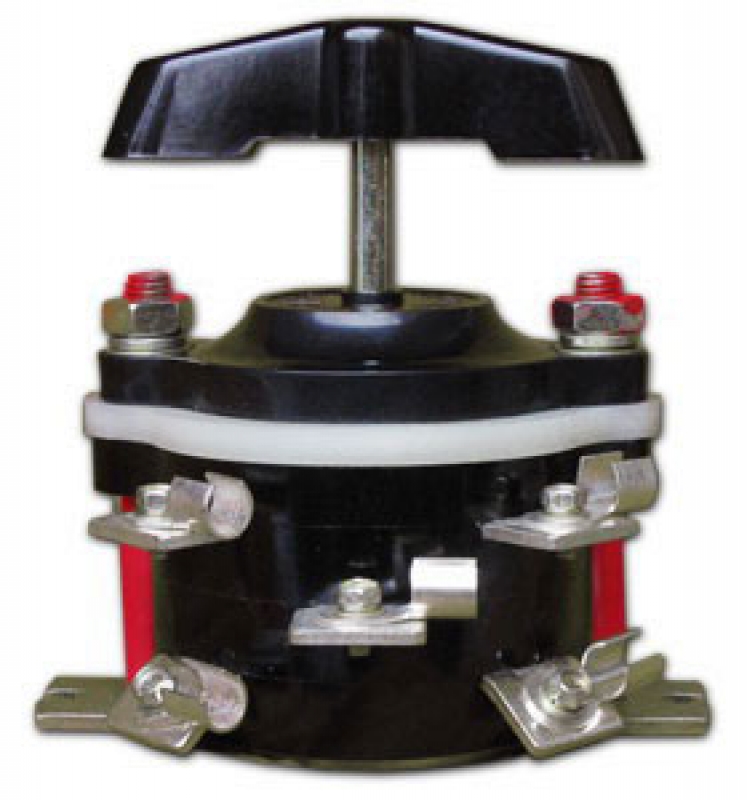
Note! If you use a package switch as input, then you can turn it off only after turning off all circuit breakers. This is because packet switches are not designed to turn off loads. And if you have successfully done this a thousand and one times before, this does not give any guarantee that this time it will not burn with your hand.
- If you have a single-pole machine installed, then disconnect the phase wire. In its place, insert the neutral wire of the damaged connection. It is very important not to confuse and insert the neutral wire of this particular connection.
The wire, which we had phase, is isolated and diverted to exclude its contact with current-carrying parts. If you have a two-pole machine installed, then it is much easier for you. We turn off the phase wire and put the zero wire in its place. - Before finding the hidden electrical wiring in the wall and the place of its damage, we once again make sure that all electrical appliances are turned off. This is especially true for devices that are powered from the area where we have damage.
- We turn on the introductory machine or batch switch.
- We turn on the machine that feeds the section of the network with damage. If you did everything right, then you have absolutely nothing to worry about. After all, you have eliminated all the possibilities of a short circuit.
- We carry out a further search for damage as our instruction advises to perform it for a phase wire. Indeed, now our neutral wire has become phase and it is quite simple to determine its damage.
conclusions
Now we know how to find electrical wiring in the wall, as well as how to look for damage to hidden and external wiring. The only thing left to do is repair.
And if everything is quite simple with external wiring, then repairing hidden wiring can cause certain problems. The main thing is to follow the safety rules when working with electrical appliances and the elimination of any problem associated with electricity will do without incident.
Due to the violation of the integrity of the wiring, immured under a layer of finishing materials, the tenants of the apartment may be left without the usual amenities. To restore the current supply, you need to know how to find a break in the wall and fix the damage found.
Damage to the power grid can be suspected in the event of a partial disappearance of the supply of electric current. A broken wire may be indicated by a lack of voltage in sockets located in a certain area, or by lighting not working in a separate room.
Sometimes wiring problems can also be accompanied by smoke or sparks in the cable.
Wire defects include breaks and breaks in the cores in the cord, as well as violations in the insulating sheath of the cable
Damage occurs on various segments of the network: the power supply may be interrupted at the junction of the cable with a socket or with a switch; in the area between these devices and the box or lighting fixture.
Causes of malfunctions
Subject to the rules for the operation of electrical communications, they can regularly serve for decades. But in practice, damage to power networks is quite common, which can be caused by various reasons. These factors include:
- Long-term cable operation. Wiring can function flawlessly for many years, but after a certain time limit, it begins to break down. In this case, twists crumble in the network and leaks appear, which regularly knock out the RCD (its absence affects the increase in leaks). Sooner or later, such violations lead to interruptions, and then to a complete cessation of the supply of electric current.
- Mechanical damage. Without knowing the scheme for laying electrical networks, when drilling holes and hammering nails in the wall, you can easily touch the wire, causing it to break, and sometimes a short circuit. Sometimes minor mechanical damage has a delayed effect: in this case, the integrity of the core may not be broken immediately, but after several months or even a year.
- Defective wire or poor quality electrical wiring. Damaged cables tend to heat up constantly, which can be fatal. After a sudden power surge, such wires can break.
- Incorrect use of adapters. Wiring failures can be caused by misuse of extension cords or tees. This can happen if several high-power household appliances are connected to the device, such as a washing machine and dishwasher. In such a situation, the cables that come from the adapter are subjected to overheating and increased stress, which can lead to melting of the insulation.
In all cases, it is necessary to find the location of the cable damage in order to immediately repair the damage.
General instructions for finding the place of the break
If a malfunction is detected, it is necessary to immediately take measures to find out the cause of the damage and find the approximate location of the defect in the electrical networks.
First of all, you need to check which rooms have problems with the supply of electric current.

Melted switches or sockets indicate that wiring damage has occurred in adjacent sections of the electrical network
Then you should find out if the cable break affected the lighting fixtures or sockets by checking them with a tester. Depending on the answers to the last question, you should follow the instructions below.
Identification of the place of breakdown in case of problems with sockets
In this case, the fault may be caused by a fault in the phase or neutral cable.
Phase wire break
First of all, it is necessary to determine to which machine the damaged socket is connected. Having found out the power source to which the faulty cable is connected, it is necessary to turn off the electricity and disconnect all wires from the shield: “zero”, “phase”, “ground” (if any).

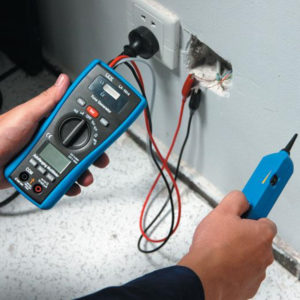
In order to find the power source of the socket, it is necessary to switch the machine, at the same time checking the presence or absence of a phase with the indicator
Then you need to arm yourself with a multimeter, with which you should sequentially check all the connections adjacent to the damaged object, starting from the cable in the shield. In this way, it is possible to identify the affected area: usually there are two wires between two sockets, and if there is a "ground" and three wires. If only one vein can be identified in this area (for example, zero), we can safely assume that the cliff is located here.
Terminal boxes are often inaccessible because they are hidden under a layer of finishing materials. If you have access to such devices, it is advisable to open them, since damage to the cores often occurs in them. If no malfunctions are found at the same time, you should check the idle wires with the indicator, starting with the twists, and also examine the terminal block and the disassembled twists.
A wiring option is possible that does not provide for the installation of a box. In this case, the cables go freely from one outlet to another, while two wires that make up 4 cores enter each socket. In this case, to identify a defect, it is required to remove the devices located at the beginning and end of the faulty section, and then examine all the wires with a multimeter.
Break of the neutral wire
The search for a break in the neutral wire practically does not differ from the work on detecting a break in the “phase”, however, it has certain features.
You can find out about a break in the zero core at the socket contacts by bringing an indicator screwdriver to this place: it will glow on the “phase”, but it will show the absence of “zero”. In this case, it is useless to use a multimeter to check the voltage, since this device will show an arbitrary value from 0 to 220 V.
It is important to observe strict safety precautions: due to the presence of a phase, there is a risk of electric shock even if the socket is not working.
The intricacies of wires placed inside the wall are quite difficult to figure out. In order to identify a faulty cable, it is often necessary to check the integrity of each element of the network.
If a three-core cable is used for distributing electricity, as a last resort, a “ground” conductor can be used to transmit “zero”. However, in this case, the "ground" function will be absent in the outlet: this is generally undesirable and unacceptable when it comes to high-power household appliances, such as a washing machine.
Troubleshooting Lighting Wiring
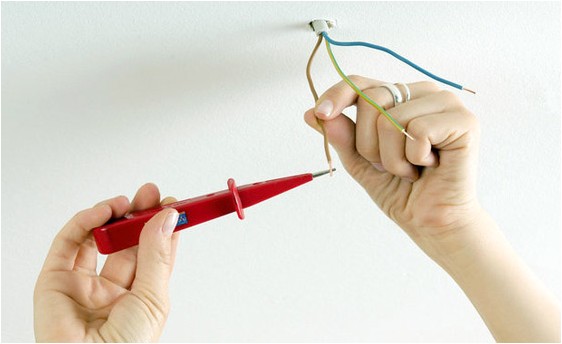
If damage has occurred between the box and the switch or a source of artificial light, an indicator (single-pole voltage indicator) should be used to determine the presence or absence of a "phase" with it.

If there is no light in one of the rooms, you must first check the condition of the lamps and cartridges. If their condition does not cause concern, most likely we are talking about a cable break.
To do this, open the switch from the lighting device; in the off position, the presence of a “phase” on the contacts is checked. In its absence, the place of the break is located between the box and the switch. If there is a "phase", its presence is also checked on the lamp (in this case, the switch is turned on). In the absence of a “phase” on all cores, the damage should be sought between the lamp and the box.
There is an option when, when the lighting is not working and there is no “phase” on the switch, the indicator shows its presence on the lamp. This arrangement means that the neutral and phase wires have changed places.
To solve the problem, it is required to trace the passage of the “phase” wire along the entire distance of the laid cable, starting from the box to the lamp and further to the switch. It is necessary to find the point where the wires were changed, disconnect them and make new fasteners, correctly arranging the wiring.
When performing a damage search, you should turn off the power supply to the cable, which can be from any source. In some cases, it may be necessary to burn the wiring insulation to reduce the resistance level.
Having established the approximate affected area, one should proceed to an in-depth search for the damage site, which can be carried out using various methods.
Finding the exact location
There are various ways to find a damaged wire.
Opening the wall during major repairs
The simplest means of detecting cable damage is to completely clean the walls from finishing materials. In this case, it is easy to inspect the strobes made to accommodate hidden cables. They differ in color from the rest of the surface, in addition, putty is additionally applied to them.
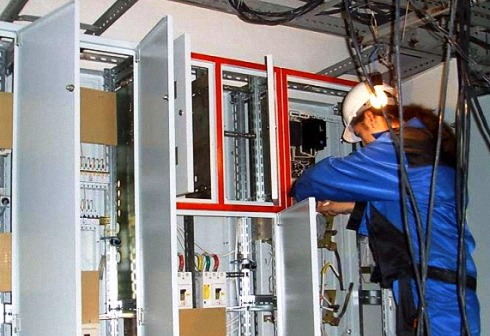
Finding a broken wire is a rather complicated process, so in some cases it is advisable to call power supply specialists with special equipment
However, since in this case the complete exposure of the walls and the dismantling of decorative coatings (paint, wallpaper) are required, it is advisable to use it during the overhaul of the premises, which provides for a new design of vertical surfaces.
Boolean search method
If the tenants do not have a power plan, you can try to recreate it using logic.
Professional electricians are well aware of the basic principles of laying electrical communications, namely:
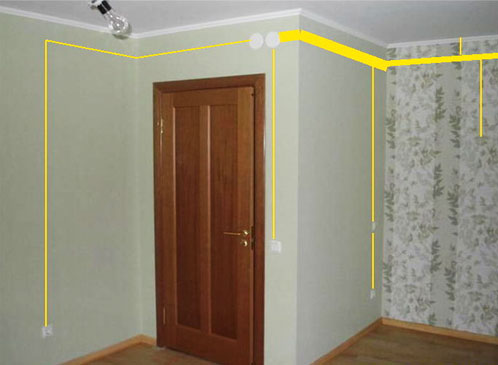
- Wiring is always carried out strictly along vertical and horizontal lines, that is, the cables always run parallel and perpendicular to the floor.
- Power lines located above sockets and switches always go straight up, which is why drilling and nailing are strictly prohibited in this area.
- The wiring is usually stretched at a distance of 15 cm from the floor or, more often, the ceiling, so it is also not worth carrying out repairs here.
Knowing the location of sockets and switches, you can create a communication scheme in the apartment.
Knowing the basic principles of the location of electrical networks, you can reduce the time to find faulty wiring by focusing on the most likely areas of damage.
However, to check the proposed layout of electrical networks, it is advisable to use special devices (professional or homemade), which will be discussed below.
Tools available: radio and microphone
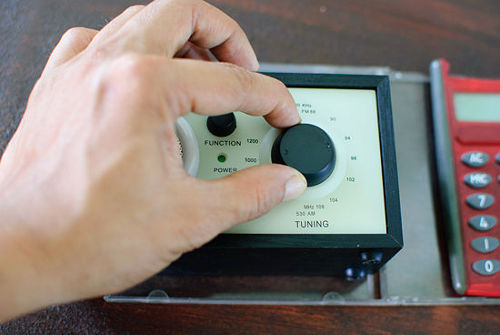
If necessary, a conventional transistor receiver will allow you to install a cable lesion site. It must be tuned to 100 kHz waves and brought to the intended affected area. Above the place where the power grid passes, the noise of the receiver will increase, and the crackle will subside above the place of the break.
![]()
Do not rush to throw away the microphone from the old radio. This elementary device will help you identify the location of the damage to the electrical wire.
Instead of a radio, you can also use a microphone from a portable tape recorder. It should be connected to the network and carried over the surface of the wall where the faulty cable is supposed to be. As in the previous version, a crack will be heard above the electric line, which will stop when a break is detected.
It is important to consider that improvised devices give an error of 10-15 centimeters. In order to avoid electric shock when performing repairs, it is better to play it safe by taking additional precautions.
Search with professional equipment
Special devices allow not only to detect the cable, but also to find the area where the burnt or broken wire is located.

Inexpensive household testers are available for sale, with which you can easily examine the wiring and find a damaged wire.
Among the various devices used to search for damage can be noted:
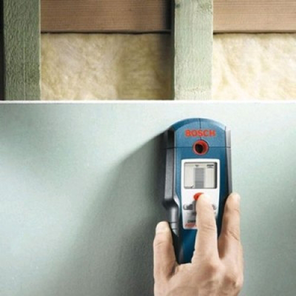
- Signaling device E-121 ("Woodpecker"). With it, you can carry out work at a depth of up to 7 centimeters, which allows you to detect electrical wiring and a broken core even in a wall finished with drywall.
- MS detector. Another popular detector that is easy to use and allows you to get a fairly accurate result.
These and similar devices give fast and reliable results, but they have certain disadvantages. First of all, with their help it is impossible to find a cable protected by a foil shield. Such devices react not only to electrical wiring, but also to other metal objects, for example, nails and screws located in the wall. Finally, although these detectors are easy to use, they require attention and skill to operate.
You can also examine the wire in the wall using an indicator screwdriver, but this method is only suitable for the case when the live wires are at a shallow depth in concrete.

The thermal imager allows not only to determine the location of damage, but also to check the quality of electrical communications in the building, detecting network problems (short circuit, leakage)
Bosch DMF 10 zoom, VP-440, POSP-1, GVT-92, GVD-504A and others are also suitable for detecting hidden wiring and a conductor damage point under plaster. It is possible to use a locator or other professional equipment.
Checking wiring with a homemade device
An alternative to expensive professional equipment can be a budget metal detector made from improvised material. One of the most popular options is a device for the manufacture of which old CDs are used. Despite the apparent simplicity of this device, it allows you to find live wiring under decorative trim at a depth of up to 10 cm.
Making a metal detector with your own hands
For the device you will need:
- unnecessary CDs and DVDs (two-sided allow you to make the device more sensitive);
- battery "Krona";
- calculator (simple model);
- glue;
- insulating tape.
Step-by-step instruction:
- First of all, you need to cut off the headphone plug. Strip the insulation on two wires, exposing the cores by 0.5-1 centimeter.
- The exposed wires should be divided into 2 parts, so that 4 veins are obtained.
- One of the contacts taken from different groups is attached to each of the disks. On a double-sided media, they are attached arbitrarily, on a single-sided media, they are attached to the writing side.
- The installed wires are fixed with glue, and then additionally fixed on the disks with electrical tape.
- The remaining two cores are connected in the standard way to the plus / minus of the battery, after which the bare contacts are carefully insulated with tape.
- The included calculator is also attached to the CD using insulating material.
- A DVD is placed on top of the calculator, then the design is fixed with electrical tape for integrity.
- A battery is attached to the surface of the video disc with electrical tape.
After that, you can test the device, which will make a sound over metal objects.
A homemade metal detector can also be made from an AM radio and a calculator. It is enough to put the included elements in the box from the discs and secure with electrical tape
Modern construction technologies often involve the use of beacons or markers in places where electrical networks pass. This greatly facilitates the process of finding a damaged core using both professional and amateur tools.
Search for electrical wiring for preventive purposes
Usually electricians or residents start looking for cables passing through the apartment when there are violations with the light. Meanwhile, it is worth taking care of this in other situations:
- Before the planned redevelopment of the apartment. For any manipulations that affect even non-bearing structures (for example, when disassembling a partition or moving a doorway), it is important to consider the location of electrical communications.
- Before installing a sconce, hanging a picture or other wall accessory. To carry out such work, it is important to know where the cable is, so as not to stumble upon it when drilling holes or driving nails.
- When purchasing a home. Immediately after buying an apartment, it is advisable to draw up a plan for electrical networks located along the walls and ceiling. On the diagram, it is also worth noting the locations of sockets, switches, and a junction box. Such marking will help when performing major / cosmetic repairs of the apartment, as well as when arranging furniture.
To search for the power line, you can use home-made or professional devices that were described above.
Elimination of a break in the phase and neutral wires
Having found out the exact location of the cable break and determining its feature (damage to the “phase”, “zero”), you can begin to repair it.
To repair a damaged phase wire, follow these steps:
- First of all, you need to disconnect the phase wire.
- Using a hammer or other tool, remove plaster or other finishes from the wall surface. It is necessary to free the area along the route by about 10-15 cm, capturing the area to the right and left of the alleged center of damage.
- It is required to separate the damaged core from the network, trying not to touch the insulation on other cables.
- Copper wiring is best connected by soldering. To do this, you need to take an additional piece of a similar product from which a repair jumper is made.
- It is also advisable to first put a PVC or heat shrink tube on the core of the damaged cable. The ends of the jumper are twisted with the ends of the broken wire, after which the connections are soldered.
- An insulating tape is applied tightly (in several layers) to the repaired place, after which a tube dressed on a wire is carefully pushed onto it. This ensures the tightness of the fastener.
Aluminum wires are less susceptible to soldering, which also requires special solder and flux. In this case, the WAGO terminal will be the most reliable connection method, while the place of its attachment must be wrapped with electrical tape and additionally covered with sealant.
The wires can also be connected using a junction box. To do this, the insulation is removed from the broken wire, after which its ends are bred in different directions. Using a puncher equipped with a special crown, a hole is punched in the wall, the dimensions of which coincide with the parameters of the junction box.
The device is inserted into the opening, after which it is fixed with alabaster. Wires are placed in the box, while the damaged cores are connected by color and wrapped with insulating tape. In conclusion, the box with the restored wires is closed with a lid.
If the cables are placed in special tubes, the damaged cores should be carefully pulled out, and new wires should be inserted in their place using a pulling device.
If the neutral cable is damaged at the beginning of work, it must be disconnected from the bus by attaching a phase conductor. The rest of the process is the same as described above.
After any type of repair, the strobes are covered with plaster. It is possible to give voltage to the repaired wiring only after the coating has completely dried.
Laying open electrical networks
Repair work associated with a break in the wire of hidden wiring usually requires complex construction and repair work: dismantling the finish, chasing the walls, followed by sealing and covering the wall section with decorative materials.
Eliminating a break in a hidden wire often requires dismantling the finish, so it is advisable to combine such work with a major overhaul of the premises
Since the immediate implementation of such manipulations is not always available, in some cases it can be recommended to lay a new wire along the wall surface, covering it in a special box or tube.
The videos below provide detailed video instructions for finding a damaged cable.
Search for a cable break with a metal detector:
If you have a radio on hand, it can also help:
Finding a broken wire is a rather complicated and responsible process. It requires attention, accuracy and strict adherence to instructions. Using the methods outlined above, you can find the place of damage to the wire and eliminate the defect found.
In rooms where it was designed and installed in compliance with the generally accepted rules for electrical installations, problems rarely occur. However, breaks do happen. Most household and industrial appliances are powered by electrical network, and when the electricity suddenly disappears, all the planned things collapse. Therefore, in order to quickly fix the problem that has arisen, it is useful for everyone to know how to find a broken wire hidden in the wall.
The main reasons for the break
Most often, a problem is detected at the junction of the hidden wiring coming to the switch, outlet or junction box. This is the most common case in which the search for a broken wire does not take much time. A situation arises when you need to drill or gouge a wall in order to hang a cornice, a picture or something else, and hidden wiring is accidentally damaged. Sometimes only the insulating material is broken, and the detection of a break does not occur immediately. Basically, this happens due to inattention.
The most rare situation is a hidden break in the wiring in the wall without the influence of external factors. This situation is typical for old premises in which hidden wiring has not been replaced since construction.
Finding the break point in this case is the most difficult. Cables wear out over the years, overloads occur in the network, a break can occur due to a malfunction of the residual current device. In order to independently make repairs in such cases, you will need a special device to detect the breakage of hidden wiring.
In addition, areas where hidden wiring is connected using the usual twisting method begin to overheat over time and the contact breaks. When laying hidden electrical wiring, the use of such a connecting method is unacceptable.
Finding and repairing a break in hidden wiring should be carried out using tools with insulated handles.
Detection methods
Initially, when the hidden wiring breaks in a house or apartment, you need to check whether the voltage is supplied to the meter. To do this, turn off the machines in the electrical panel, and use a tester to measure the voltage at the meter contacts. If there is no voltage, then the problem must be sought in front of the meter. Voltage detection means that a hidden wiring break has occurred somewhere in the house.
The first step is to determine exactly which conductor is damaged - phase or zero. This is easy enough to do with an indicator screwdriver. Electricity must be turned on. When inspecting the switches in the "on" position, both contacts are energized; in the "off" position - 1 contact. Only 1 contact is energized in a working socket. If the phase is present during the test, then a hidden break in the neutral cable has occurred.
In almost all rooms, electrical wiring is hidden in the walls. In these cases, after finding a faulty cable, it is necessary to establish the exact location of the conductor in the thickness of the plaster or concrete. Not everyone has a wiring diagram for a hidden electrical network at home, so you need to use a special finder, which will greatly speed up and facilitate the process. The simplest option, which will give results with high accuracy, is to buy a modern device. For home use, the simplest detection tools are suitable.
In addition, you can independently make a hidden wiring finder. There are a lot of options, below are methods that have repeatedly proven their effectiveness in practice:

Search for a break
With the help of such homemade devices you can find the place of the hidden wiring break. If a broken contact is detected, the device will stop beeping, the nature of the noise will change, or the indicator light will go out. However, these devices have one significant drawback: cable detection is impossible if the hidden wiring is at a depth of more than 5 cm.
Modern equipment is more accurate and easier to operate. To detect hidden wiring at a depth of up to 10 cm, a special non-contact finder is used.
But if there is an armature or other metal element in the wall, then the detection of hidden cables is more difficult, because. false signals will appear. This must be taken into account.

For the most accurate search for a break in hidden wiring, seekers are used that have the possibility of additional settings, which allows you to ignore large metal objects in the wall. This feature eliminates false signals. If there is direct access to the wiring along the entire length, then the damaged area is often visible to the naked eye. In the case when there is no visible damage, the search for a broken electrical wiring can be done using a conventional tester. The algorithm of actions will be as follows:
- first of all, it is necessary to de-energize the room by turning off the electricity supply in the electrical panel;
- after that it is necessary to strip the wire in two places: at the outlet of the distribution block and at a distance of 1 meter from the notch made;
- resistance is measured on this segment, then another notch is made after 1 meter and the procedure is repeated;
- the resistance at all measured intervals should be the same. When the device finds a section where the value is very different or completely absent, a break occurred in this place.
If it is not possible to buy a special finder, but there is a great desire to solve the problem without outside help, you can assemble a primitive device to search for a broken wire with your own hands.

All you need is a working cartridge, a light bulb, two solid wires, a knife, pliers and electrical tape.
A light bulb is screwed into the cartridge, wires are connected. From the other ends, the insulating material is cleaned 4-5 mm from the edge.
It is extremely simple to check the assembled tester; electricity must be supplied to the wires. If the light is on, then everything is assembled correctly.
Detection of a broken wire consists in connecting the tester to the wire under test, on which it is necessary to make notches with a knife (before stripping the cable, you need to turn off the power supply).
If you find an area where the light on the tester does not light up, you need to start moving in the opposite direction, making notches at a smaller distance. After finding the desired location, the damaged section of the wiring will be replaced, all the notches made must be insulated.
It is advisable to find out the location of hidden wiring and draw up a detailed diagram before a break occurs. This will protect against damage to the cables during repair work. In case of accidental contact with hidden electrical wiring, at best, the room will be de-energized, at worst, human health will be harmed.
There can be a lot of reasons for electrical wiring problems, it can happen at any moment, including the time when the wires are energized.
The fault of this may be the marriage of the wire, poor-quality installation, erroneous and much more.
In those places where the cable is damaged, the wire will heat up, and if there is an increased voltage, it will break.
The cause may also be mechanical damage, as a result of improperly hammering nails into the wall and drilling holes, and the problem may also arise due to overvoltage.
How to determine a broken wire
A wire break can be of two types, it can be a break in hidden or open wiring. If this happened with hidden wiring, you need to know how to find a broken wire, a regular transistor receiver will help you find the cable line.
To begin with, you can connect any device to the outlet, for example, an electric razor, you need to put the receiver on the medium wave range and move it over the surface, if you hear noise and crackling, it means that the wiring has broken in this place.
- If there is no light in the apartment, you need to understand whether the voltage is going to the meter. To do this, you need an indicator tester, they need to touch the contacts of the meter, before that, turn off all the machines on the electrical panel.
- If there is no voltage when pointing the tester at the meter, then the place of damage is in front of the meter. If it is, the break occurred in the apartment. Sometimes, to eliminate all malfunctions, you just need to replace the fuses.
- If the case is more complex, you need to troubleshoot the system. Most often, breaks occur in junction boxes, since with high resistance, the wires can burn out.
- If the damage occurred in an open wiring, then it is easier to find and fix it, but if the wiring is closed, then it is better to contact a specialist, since there is a lot of work to be done.
Before starting work on eliminating the break, you need to take a tester to detect voltage, you will also need a special screwdriver indicator and a simple screwdriver, pliers and a knife with an insulated handle, insulating materials and a non-contact indicator of a hidden electrical wire.

In order to find a break in open wiring, you need to understand which wire is damaged: phase and zero, an indicator screwdriver will help with this, it will identify all the contacts of switches or sockets and check their serviceability.
If the socket is energized, then it has only one contact. If we talk about the switch, then at the moment of power amplification, only one or all contacts can be turned off. If, thanks to a screwdriver, it is found that the phase is operational, it will be seen that the neutral wire is damaged. If the wiring is hidden, then it is better to invite professional electricians to determine the malfunction.
It will be better if it is damaged, you should try not to overestimate your capabilities, especially in such a serious matter.
If you have sufficient skills in working with electrical wiring, then you can find a break in the hidden wiring yourself, for this you can use the acoustic or induction method.
- For the acoustic method, you will need a generator, you need to connect it to the cable, you will also need headphones and an acoustic sensor.
- The process consists in listening to the wiring with these devices. At the place of the break, you will hear clicks in the headphones, while the generator will need to be properly configured.
If you decide to use the induction method, the generator must be connected to power cable, determine the load level and apply the sensor, where the break occurred, you will also hear signals.
If you have concrete or brick walls, use a proximity indicator to find hidden wiring. All cables in such buildings are installed horizontally or vertically, and all turns are made at right angles.
Usually, in such houses is well known. The indicator must be moved along the wall and you will hear a signal in the area of the cliff. You can use other methods, but for their application, you need to invite specialists from companies licensed to carry out such work.
How to fix a broken wire?

Before starting work to eliminate the break, you need to turn off the phase wire. Using a hammer, remove all the plaster in the center of the damage, as well as on the right and left, in total you need to free up to 15 cm.
The ends of the broken wire must be pulled apart. Using a puncher and a special crown, make a hole in the wall so that the junction box fits in it.
Place a box in the opening and secure it with alabaster, you need to carefully place the wires in it. If there is a margin, damaged wires must be combined by color and wrapped with electrical tape.
After finishing work, close the box with a lid and cover the repaired area with plaster. If the wiring is in special tubes, the broken wires must be carefully pulled out, and new ones should be put in their place using a broaching device.
In general, this work requires quite serious knowledge, especially when it comes to hidden wiring, but with a certain skill, this is quite doable. If you want to learn more about this, you can visit our website, there you can always find a lot of useful information.