Star news


How to choose an interior door. What is an extension for an interior door: features, sizes and types
Very often, when replacing interior doors, a problem arises: the thickness of the wall in which the doorway is located is greater than the width of the door frame. The remaining uncovered sections of the wall look unattractive and spoil the overall impression of the new door. Door extensions will help to cope with this problem and give the doorway the necessary strength and a finished look.
Door trims and their varieties
An extension or additional board (plank) is a flat rectangular board. For its production, solid wood and laminated or veneered MDF boards are most often used.
This product does not differ in the variety of types. All additional elements can be divided into two groups:
- ordinary;
- telescopic.
Ordinary additional planks look like an ordinary board, and differ from each other in the material from which they are made, color and width. The market offers extensions with a width of 100, 120, 150 and 200 mm.
Telescopic extensions are similar in installation principle to lining. This type of plank is equipped with a groove on one side and a ridge on the other. This allows you to line doorways of any width. On sale you can find telescopic extensions with a width of 90, 120 and 150 mm.
It is also worth mentioning the decorative corner, which combines the functions of an additional board and a platband. This product is used only with a door frame of a special design. At its ends there are deep grooves into which the platbands are mounted. It is convenient to use additional elements of this type when the width of the door frame is not enough, up to 50 mm. They are not suitable for wider openings.
How to choose the right additional elements?
Today, in almost all retail outlets offering interior doors, door accessories are also presented. Therefore, there should be no problems with the choice of color and texture of these components.
When choosing the size of additional strips, you need to make simple calculations. To do this, you will need to know the width of the wall (WW) and the width of the door frame (WW). Knowing these values, you can easily calculate the width of the extension (SD): ШД = ШСТ - ШК.
Attention! To obtain more accurate calculations, the width of the wall should be measured at several points, at least four. The measurement with the highest indicator must be inserted into the formula.
Also, when choosing extensions, you should pay attention to the design of the door frame. If it has a special groove for installing an additional board, then its thickness should correspond to the thickness of the groove.
Technology for installing extensions on interior doors
Installing door trims does not require any special skills, so this task can be done with your own hands. Additional boards should be installed after the interior door frame is mounted in the opening and the foam has completely dried. If there is a special groove in the box for access, it must be thoroughly cleaned. If it is not there, you need to clear the foam from the space behind the box. The width of the resulting gap should be 1.5–2 cm, depth – 1–2 cm.
Further installation technology may have slight differences depending on the type of additions.
Installation of conventional extensions
The entire process of installing conventional additional strips with your own hands can be divided into several successive stages:
- Adjustment of the top additional board. First, the plank is measured and cut to length. Next, the width is adjusted. To do this, the board must be inserted into the prepared groove with the working side facing outward and markings for the width of the wall at both ends. Connect the resulting points with a straight line and make a cut along it.
- Adjustment of side boards. It is carried out in the same way.
- Assembly of accessories. At this stage, it is necessary to adjust the side additional elements in length so that the top plank lies flat on them in a horizontal position.
- Fastening additional strips. To avoid the formation of cracks and gaps, it is necessary to wedge the additional board between the opening and the frame. As wedges, you can use pieces of wood, cardboard folded in several layers, or dried polyurethane foam. After inspecting the junction of the top plank with the side planks, the space between the extensions and the opening is foamed in spots. When the foam dries, the remaining cavities are filled with it.
- Installation of spacers in the opening between additional elements. This action will prevent them from moving during the drying process of the polyurethane foam.
- Installation of platbands.
Installation of telescopic additional strips
The process of installing telescopic elements generally repeats the steps of installing conventional extensions. The peculiarity of the installation of this type of extension is that each subsequent row of planks is installed only when the previous one is securely fastened in the opening.
Thus, telescopic door panels can be installed with your own hands without any problems.
Installation of additional trims
This type of additional elements is easier to install than all others. Combined extensions-platbands do not require major fastening. The entire installation process consists of adjusting them to length and installing them in a special groove on the door frame.
First, the top trim is measured, cut and installed, then the side corners are installed. The side elements should be trimmed only from the bottom, since there is a recess in their upper part that ensures a tight connection of the side parts with the top. For installing additional elements on interior doors with your own hands, this variety is simply ideal.
Installing extensions on the front door is not much different from installing these elements on interior doors. Their installation can also be done by yourself without the help of professionals.
There are three ways to install additional elements on a metal door:
- underlay (additional board is tucked under the box);
- attached (the product is applied directly to the box);
- using a mounting bar.
Additional strips made of MDF or natural processed wood are ideal for the front door. These materials are resistant to mechanical stress, high humidity and have sufficient heat and sound insulation.
The stages of installing extensions on the front door can be outlined as follows:
- Taking measurements from the wall to the frame and from the top of the opening to the threshold.
- Preparing the planks in accordance with the obtained dimensions. There should be three parts in total: two vertical and one horizontal.
- Fastening of additional elements. If a gap forms between the boards and the wall, it must be filled with foam, fixed and waited for complete drying. If there are no gaps and the extension fits tightly to the wall, it can be attached using glue, galvanized nails or self-tapping screws. The heads of nails and screws are masked using special mastic or plugs to match the additional fabric.
- Installation of platbands.
Installing door panels will not take much time. After completion of the work, the doorway will take on a beautiful and complete look.
Why are extras needed and what are they? Before answering this question, we need to remember a little, and young people need to study history. As it was before? Each production plant building materials strictly complied with the current state standards for its products. The sizes of bricks, blocks, panel slabs, etc. were regulated. d. Construction organizations had standards for the thickness of plaster. This allowed woodworking enterprises to produce woodwork (windows and doors) with standard door frame sizes. After installing them in the openings, no additional adjustment with additional trims for the platbands was required.
Today everything is different. The vast majority of enterprises are guided not by state standards, but by their own technical conditions. This has led to the fact that the same brick or block from different manufacturers can have different sizes. Now no one can confidently determine the thickness of the walls; it is impossible to make several standard sizes of door and window frames. The solution was found simple and effective. The box is made with the minimum permissible width, which guarantees its physical strength, and the missing width, depending on the thickness of the walls, is gained by installing extensions.


Due to the fact that most modern door frames are made of MDF in order to reduce costs, the same material is also used during the manufacture of extensions. There are, however, door frames and extensions made of natural wood, but they are rare and cost much more. The principles for installing wooden and MDF panels are no different.
Extensions are ordinary boards made of MDF, have a width from 100 mm to 200 mm, are produced by door manufacturers, and have the same color and texture as the doors. According to their design, they can be ordinary (simple) and adjustable. Simple extensions rest against an L-shaped cutout in the sides of the box; adjustable ones with the box have a tongue/groove connection. This allows you to accurately adjust the protrusion after taking the preliminary dimensions and preparing the extensions. In addition, the presence of the connection somewhat simplifies and speeds up the foaming process.

| Photo | Size | Color | Price |
|---|---|---|---|
| 8x100x2070 mm | bleached oak | 114.00 RUB/pcs. | |
| 10x100x2070 mm | Italian walnut | 167.00 RUB/pcs. | |
| 12x2150x2150 mm | snow rosewood | 188.00 RUB/pcs. | |
| 12x80x2100 mm | pine | 193.00 RUB/pcs. | |
| - | acacia | RUB 2,192.00/piece | |
| 100x2150 mm | nut | RUB 468.00/piece |

We will look at installation methods for both types of extensions, starting with simple ones.
Prices for extras
Installation of simple extensions

Simple additions can be joined with foam (the fastest method), nails and screws (the longest method). Choose yourself the method that seems most appropriate to you; experienced builders install extensions only on foam. The method of installing the extensions has almost no effect on the reliability of fastening the platbands, and the work is significantly simplified and accelerated.
Adjustable extensions are installed only on foam.

Measuring and preparing accessories
The technological task of the extensions is to serve as a platform for attaching platbands. In order for the platbands to lie correctly, the end of the extensions must lie in line with the plane of the wall. Measurements should be taken on an already installed door frame. Sizing is performed in the following ways.

Now you need to find out the height of the left and right elements and the length of the horizontal one. At the top of the box, the extensions are connected by the letter P, take this into account when taking dimensions.
You can cut additional boards with a hand saw, a jigsaw, a portable electric saw, or on a stationary machine. The latter option is preferable - the work is much faster, its accuracy increases and the risks of chipping are minimized.


First, cut the pieces to length, then make width marks on each one at the ends. Draw a straight, even line and carefully cut off the excess part. It is better to draw a straight line using the same extensions; you don’t have to look for straight and long wooden slats. At the cut site, you need to remove a small chamfer, so the board will fit more tightly to the door frame.
Jigsaw prices
jigsaw
Video - Measuring extras
All elements are prepared, you can start installing them. Let's start with the most complex method and end with the simplest.
Installing extensions with self-tapping screws
Step 1. On the extensions, make a hole for the screws.

The thickness of the MDF boards is 10 millimeters; for melting you need to take a drill with a diameter of no more than 9 millimeters. The exact diameter should be coordinated with the diameter of the screw head. The diameter of the caps, in turn, changes with their length. The length of the screws is selected so that they fit into the door frame two or three turns, otherwise it may crack.

It is advisable that the drills be made to look like wood; they have thin needle-like protrusions at the end, which allow more accurate centering of the hole and prevent the drill from moving during drilling.
Important. Always leave at least 1.5 mm of board thickness on the side of the front part of the extension; there is nothing to worry about if the hole for the countersunk completely drills out the side of the extension from the back side. The depth of the hole is regulated by the length of the screws; the main condition, as we have already mentioned, is that they should be screwed into the box no more than two or three turns. In total, it is enough to install 4 screws for the long vertical part, and make the same number of holes.
Step 2. Drill holes for screws. The diameter of the drill must correspond to the diameter of the screws. Drilling these holes is somewhat more difficult; you need a keen eye and dexterity.

How to drill them?
- It is better to drill holes on the back side of the holes for the countersunk.
Very important. You will need to drill not perpendicular to the plane of the board, but at a slight angle. This is done so that the self-tapping screw is directed towards the center of the door frame - the possible risks of cracking on the front part are reduced. If the end of the screw comes out from the back of the box, there is nothing to worry about.
- Place the drill perpendicular to the drilling plane exactly opposite the hole for the countersunk.
- Drill a few millimeters deep, turn off the drill. Set the drill bit at the desired angle and continue drilling until its tip appears in the countersunk hole.


We have already mentioned that this method is the most difficult, and we do not recommend using it. But, if someone has convinced you, then we will continue to talk about him. Prepare all the elements of the accessories using the described method.
Step 3. Insert the screws into the holes and twist them until the ends appear on the opposite side.

Step 4. Screw on the vertical extensions first, then the horizontal ones. If the self-tapping screw is tightly screwed, do not use much force, unscrew it a few turns, and then screw it in again.


Step 5. Check the position of the extensions; if there are places with a loose fit to the door frame, press them with any available materials.
Step 6. Prevent the boards from bending with polyurethane foam.
To do this, you can fix them in two ways: with construction paper tape or spacers. Construction tape has high tensile strength in the perpendicular direction and calmly holds the force of the foam. If the wall is smooth, use carpenter's tape and stick it to the paneling and the wall in three or four places on the vertical elements and two or three on the horizontal ones.
If the tape does not stick to the wall, use spacers. They can be made from wooden slats. The length of the slats should be 1÷2 centimeters shorter than the width of the doors. Subsequently, the spacers are pressed with various pads.
Step 7 Fill the gap between the wall and the extensions with polyurethane foam.

Very important. It is rare to find responsible builders who, before foaming any structures, clean them of dust and wet the surfaces. And foam has very weak adhesion to dry surfaces; there is nothing to say about dust and dirt. Try to touch fresh foam with a wet finger - then you won’t be able to wash it off with anything.
For foaming, use any foam, the extensions are not a door frame, they do not carry any load, you can use the cheapest brands. The main thing is don’t leave any gaps. If the gap between the wall and the extension is narrow and deep, fit various extensions to the nozzle. For very thin cracks, we used cocktail tubes - we taped them to the existing outlet of the foam can and worked. This design, however, is disposable, but you don’t need more.

Step 8 Wait at least 24 hours for the foam to cool, and use a sharp mounting knife to cut off any excess. Check the stability of the position of the extensions by tapping. If you find problem areas, add foam to them.

Prices for polyurethane foam
polyurethane foam
Video - Installing extensions with screws
That's it, the work on installing the extensions is finished, you can start working with
Installation of extensions on studs
In this section we will talk about another way to measure the dimensions of the extensions. They need to be inserted one by one into the seats of the door frame and using the sharp side of the rule to draw a wall line.

You must act carefully. If you inserted additional elements in the position in which they will be fixed, then the marked line must be symmetrically moved to the other side of the board and only cut along it. But you can insert the board rotated, then the line will immediately be in its place. Further, all circumcision operations are identical to those described above.
Step 1. Using a small diameter drill (should correspond to the diameter of the finishing nails no more than one millimeter), drill holes at a distance of approximately 20 cm in the end of the extension adjacent to the door frame.

In the photo - the finishing nail next to the finisher
Important. Drill carefully and keep the drill strictly vertical. The depth of the holes should be 3–5 millimeters less than the length of the nails.
Step 2. Insert the nails into the drilled holes until they stop. Before this, you need to bite off the caps with pliers; the carnations are inserted with the sharp end outward.
Step 3. Carefully insert each accessory element one by one into its place in the door frame. Using a hammer, drive the sharp protruding ends of the nails into the door frame through the wood spacer. Take your time; before fixing, firmly press the additional element against the side of the protruding seat of the box. If you are inattentive and miss a gap, you will have to remove the additional element and start all over again or seal the gap with sealant that matches the door. Both options are highly undesirable. In the first case, because you will have to pull out the “wrong” nail and drill a hole for it in another place. The fact is that the incorrect fastening is located a few tenths of a millimeter from the correct one. And in this case, the nail will never make a new hole for itself, but will always slide into the existing one. In the second case, any sealing of cracks with sealant will not go unnoticed and will indicate the low professionalism of the performer.

Step 4. Wedge the extensions on the back side, secure their position with tape or spacers to prevent them from bursting with foam.
Step 5. Clean the surfaces from dust and dirt, moisten them with an ordinary water spray (spray).

Step 6. Fill the gap with sealant over the entire surface. After the foam has cooled, carefully cut off the protruding part.

Video - Installing extensions on studs
We deliberately left the easiest method for last; this will give you the opportunity to compare all the described methods and make the right choice. Marking and cutting out elements is no different from the first two.

And then everything is simple. Place the extensions in place, wedge them from the inside until the surfaces are completely pressed against the seats of the door frame, prevent them from bursting with tape or spacers, and foam them after cleaning and wetting the surfaces. As you can see, there are no steps, drilling or hammering. Why do we recommend using this particular method?
- The strength of such an installation is no different from complex methods.
- You never run the risk of damaging the extensions while drilling holes or driving in nails for one simple reason - there are no holes or nails.
- While the “big” specialist is drilling holes for screws or nails, you will completely install the extensions on two door frames yourself with the same quality of work as him.

Have you compared how many fewer technological operations there are, how much less there is the risk of damage to the doors and door frames, and how many more advantages there are? Now make your decision.
Video - Installing foam extensions
Installation of adjustable extensions
Adjustable extensions have several advantages.
- Connecting the elements into a tongue/groove allows the elements to be tightly pressed with visible planes. The appearance of cracks is completely eliminated; there is no need to wedge them.

- The extensions can move up/down or out/in in the door frame. These few “free” millimeters allow you to precisely adjust their location and compensate for possible errors during measuring or sawing.


Such extensions also have a drawback - they cannot be installed without a stationary circular. The fact is that only a stationary circular saw can be used to cut a tenon of the required thickness and depth on additional elements.
How are they installed?
Step 1. Take measurements, while taking into account the depth of the groove on the door frame. You can measure it and add it to the resulting width values, or you can take a piece of thin plywood or a ruler, insert it into the groove and measure the width of the extensions in this position. Take measurements in several places around the entire perimeter of the doorway; walls are often uneven.
Step 2. Mark the left and right extensions and transfer the dimensions to the blanks.
Important. In order to simplify the installation of all elements in the future, reduce their width by 2–3 millimeters. This reserve will make it possible to move the extensions in the grooves in the desired direction.
Step 3. Cut the blanks to length and width.
Step 4. Set the circular saw stop to the width of the tenon, raise the saw table in such a way as to ensure the required height of the tenon. Place the board on the edge and carefully cut out the tenon.

Step 5. In the same way, prepare all the remaining elements of the additions.
Everything else is simple. Install them in place, align them at the joints and along the plane of the wall. To prevent expansion, stick construction tape to the wall and extensions, clean the surfaces from dirt and dust, wet them and foam them. The presence of a tongue/groove connection eliminates the need for wedging; the extensions already hold their size perfectly and are tightly pressed to the door frame.
Video - Installation of adjustable extensions
When installing the extensions, do not create unnecessary problems and difficulties for yourself; use only the third, simplest method - installation on foam. Why?
- Firstly, the extensions are never affected by pulling forces; in any case, they will reliably hold the platbands.
- Secondly, the nails serve only to securely press the extensions to the door frame, and do not keep them from being pulled out. Ordinary wedges made of foam plastic, paper and other available materials cope with the same task no worse.
- Thirdly, any “drilling” in thin boards and in the door frame can cause cracks to appear on the front side. You will have to change the accessory or repair the box.
No one needs the first, second, and third. Why are there the first two installation methods? We think that this is one of the effective methods of undeservedly increasing wages for unscrupulous builders. They importantly tell customers that for such complex work they need to pay appropriate amounts.

You should not nail the horizontal expansion to the vertical ones in the corners of the joints; it is already perfectly pressed with foam. If you are worried, press it in these places with any wedges. Extra nails in thin trims are an extra chance to see a hole on the front part, and this is a direct defect in the work.

Do not nail the planks together
You may find advice to connect all the elements with the letter P before installing the extensions in the door frame. We do not recommend doing this for two reasons.
- Firstly, it does not reduce, but increases installation time.
- Secondly, the connection is “flimsy”; during the movement and installation of the structure, the nails will still move a little and a gap will appear between the horizontal and vertical extensions. In any case, it will need to be eliminated on the spot.
- Thirdly, the structure may become so distorted during transportation that the nails will compromise the integrity of the front side of the extensions. This is a very unpleasant situation; it will never be possible to repair the crack “to its original state.” An experienced master will always see the problem area.
And one last piece of advice. Sometimes there are times when you have to invite a specialist to help. You install several door panels yourself, and a few must be installed by a professional. Perhaps you want to finish this stage of building a bathhouse as soon as possible, or you don’t have enough time, your vacation is ending, but you want to finish finishing the bathhouse as soon as possible, the reasons may be different.

The master has come - look what tools he has. If they are dirty, it is immediately obvious that they are not being looked after - refuse the services of such a master. If among his tools you see sealants for cracks, shake the “craftsman’s” hand and send him back. Modern MDF doors must be installed so accurately that the presence of cracks only indicates carelessness, inexperience or irresponsibility of the master.
Video - Installing a door extension
Most factory doors are designed for a wall thickness of 7-8 cm, standard for city apartments. Therefore, owners of suburban buildings, whose walls are most often much thicker than apartment interior partitions, have to adapt to the realities proposed by the industry. The areas of the opening not covered by the door frame are plastered, finished with plasterboard or plastic. However, it is much simpler, easier, and faster to install an extension on the door, which is a kind of door frame extender.
Video - installation of telescopic extensions
Why install an extension at all?
The extensions are two vertical posts and one upper horizontal bar, designed to increase the “coverage area” of the box. To put it simply, they expand the door frame. They are made from solid wood, MDF and fiberboard.
These strips can be purchased together with the door block or purchased separately. The extensions are not distinguished by their extremely complex design, and a home craftsman can easily make them himself from lumber or slabs that replace wood.
Various installation methods
Assembled from three components into a single whole, the extender-extension “in full view” copies the letter P, it is attached:
- or directly to the door frame;
- or to the wall in the area of the opening;
- or on a mounting beam located between the vertical planes of the opening and the extensions.
Since no one will “put” any special mechanical load on the extensions, sometimes only liquid nails are used for fixation in a specially made recess. But mostly they are mounted using galvanized self-tapping screws. If fastening is done from the front side, the fastener caps are hidden with mastics or matching plugs.
Justified advantages of extras
- Extremely high speed of construction and installation of an expanded door block.
- Absence of “wet” finishing processes that are unfavorable for the proximity of wood.
- Maximum increase in the period between successive repairs.
And unconditional aesthetic priorities, providing the impression of integrity of a presentable door structure.
Accessories for boxes with and without a groove
You can buy doors for arranging a country house:
- with boxes, on the outside of which a grooved quarter has been pre-selected to align with the extensions;
- with box beams without the above equipment.
With the first option everything is relatively simple. Wooden or wood-chip strips of centimeter thickness are suitable for it. The width of the panel strips is measured with the base box installed in the opening. It is possible without it, but it is necessary to take into account that adding it only complements it. The width is determined by the distance from the edge of the opening to the end of the quarter-recess in the box. That is, the width of the extension is equal to the sum of the width missing to completely cover the opening and the transverse size of the recess. Most often it is 1 cm, but there may be other options.
Attention. All measurements must be carried out at several points. Preferably at four. It is possible that the readings will differ. If deviations are detected, the maximum is taken as the base size.
When fully assembled, the outer line of the extensions should be flush with the line of the opening. The millimeter-long excess is trimmed off with a plane, and then everything is closed with cash.
The additional expansion of the door structure with a groove only needs to be nailed to the base that is not installed in the opening on the reverse side with small galvanized nails in increments of 20-35 cm. You can simply insert it into the recess of the box fixed in advance in the opening, having previously lubricated the joints with glue.

If the contractor has at his disposal a box beam without a recess made by the manufacturer, he can:
- select a quarter yourself using a milling machine with a built-in ruler and a straight cutter, after which the box automatically goes into the clan of door elements with a device for installing the extension;
- attach the extensions to the box beam through holes drilled through the ends with self-tapping screws;
Note. The diameter of the through holes for attaching the extension strips to the box is not the same along the entire length. First, use a drill with a diameter equal to the diameter of the screw head, then equal to the size of its barrel.
- install additional elements on bars screwed to the wall with self-tapping screws, place the first of them 20 cm from the floor surface and then after 55-60 cm;
- “plant” the extensions together with the box inside a kind of base made of plasterboard or plywood;
- connect the box beam without a quarter with the extension strips by installing a strip running from the outside of the structure along the entire alignment line;
- The above-described lath or plywood strips should be fastened not in a continuous strip around the perimeter, but in separate sections.
Note. You need to nail both the beam and the extension strips to the rail; its central axis should coincide with the connection line, but can be slightly shifted.
Depending on the massiveness of this addition to the door block, the owner himself chooses how to install the extensions on the door. Any of these options is simple and can be done with your own hands.
Standard algorithm for installing extensions
Typically, the upper plank, combined with the lintel, is superimposed on two vertical elements. To calculate its length, two thicknesses of additional racks are added to the length of the lintel. However, it can also be placed between them. Then the length of the lintel will be equal to the width of the box, and the thickness of the top strip must be added to the height of the left and right vertical elements.

So, the installation order:
- First, we take measurements with scrupulous accuracy according to the diagram corresponding to the chosen installation method.
Note. For left and right extensions, vertical measurements are carried out separately. It is recommended to measure the inner line of the future vertical strip along the box, the outer line in fact in the opening.
- The board purchased for installation will be cut according to the measurements and the selected construction scheme.
- We attach all three additional parts to an installed or uninstalled, but fully assembled door frame.
- If the additions were nailed or screwed to a frame that was not installed in the opening, it must be installed together with the additions.
- We will place mounting wedges between the wall and the expanded door base and, by changing their position, we will align the structure in the opening.
- Before filling the installation gap with foam, we will install spacer wedges, both between the box beams and between the extensions.
- We perform foaming in portions, filling the space in at least two steps. We control the hardening process and, if necessary, make adjustments while the foam hardens. We will complete the work by sealing the gap between the wooden parts and the floor covering and installing the trim.


The listed methods for expanding a door block are applicable to both interior and entrance doors. The only difference is the width of the additional strips. If you are installing an extension on the front door, most often the width of the standard extension boards is not enough. In such cases, several strips are connected to each other using splined connections or specialized adapters.
If the hinge stand is located near a blank wall, the box can be expanded in both directions. If there is no wall limiting the movement of the door leaf, and the door can “operate” at 180º, the frame is mounted flush with the outer plane of the opening, and the extensions are located on the side opposite to the opening/closing side. They must not interfere with the use of the door.
That's all the tricks with subtleties. What will be easier, more convenient, faster and more beautiful, you decide for yourself home handyman. It is important to know that any of the existing methods does not require special skills, but it is necessary to stock up on accuracy and attention.
Extensions, or additional boards, are installed in the frame of the door if the width of the door frame (jamb, “jamb”) is less than the thickness of the wall in which the door is installed. Extensions play not only an aesthetic role, covering uneven and easily dirty slopes (if you are interested in other methods of finishing slopes, read about them here). They, together with the platbands, also strengthen the door and prevent it from warping. Do-it-yourself installation of extensions is possible both when installing a new door and on an existing door. We will look at the most common cases.
Additional boards can be made independently, from a flat board, edged or tongue-and-groove, for thick walls. For very thick or damp walls or backing boards, waterproof BS plywood (aircraft plywood) covered with a decorative self-adhesive film is very suitable: BS plywood does not delaminate or crack during fine processing of the edges and does not warp from moisture.

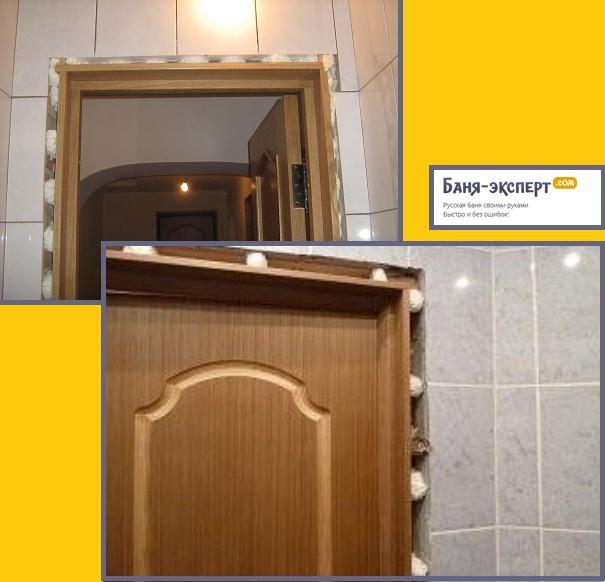
Door frame with extensions. The mustard color indicates the lining.
However, most often it turns out to be cheaper and easier to use ready-made additional MDF boards with a decorative coating. The standard dimensions of factory-made extensions are in the range of 80 – 550 mm. For cases where it is necessary to make stacked extensions on thick walls, MDF extensions with a tongue-and-groove lock are produced.
According to standard technology, the extensions are installed in a special recess on inside door frame - a quarter. However, when installing extensions on an already standing door, it is permissible to use attached extensions (adjacent to the door frame) and underlays (slipped under it).
Attached extensions are recommended to be used only in dry rooms with moderate temperatures and in cases where the door is made of very high quality or may lose value due to alteration (for example, if the door is an antique item or a museum exhibit).
If the door is slanted
If the door jamb is skewed and the deviation of the top bar from the horizontal is more than 5% of its length, and the door leaf is adjusted to fit the slanted frame, installing extensions without altering the door is not recommended. The door frame itself does not warp; its distortion indicates structural defects, without correction of which the additions will not immediately look good, and subsequently they will warp and split.
Tools and accessories
To install door trims, you will need some additional tools: a hand-held wood router, a hand-held circular (parquet) saw and a clamp with a soft bed frame. The clamp is most needed so that, by pressing the saw against the stool with the disc up, you can get a convenient mini-circular saw. You can tighten the clamp softly by sequentially putting a heat-shrinkable tube on it and heating it over a gas burner at a distance of 0.4 - 0.5 m in 3-4 layers.
The accessories you will need are 3-4 stools of the same height and not wobbly, 4-5 wooden planks approximately 30x30 or 40x40 mm, a dozen wedges from the same strip and several strips (you can waste) of ordinary packing plywood or plasterboard.
Door installation process
Knocking out the base plane
In the doorway prepared for installation of the extensions, you must immediately knock out a base plane and mark its mark on the floor with a pencil. This is exactly done using the Pythagorean triangle method (a right triangle with an aspect ratio of 3:4:5; the “magic triangle”). Let's give an explanation of how to do this in the figure:

- We consider half the width of the doorway at the bottom to be equal to three basic lengths - 3l. If, for example, the width of the opening is 60 cm, then half of it is 30 cm, and the base length (l) is 10 cm.
- We make two marks from the corners of the opening with a cord 5l long. From their intersection at point B to point O (the middle of the opening) there should be 4l. In this case, the OB line will be exactly perpendicular to the plane of the opening, and all measurements can be taken horizontally from it; a plumb line will give the required vertical accuracy.
Note: If you have the opportunity to use a laser base surface projector, then the described procedure is not necessary. But it will not be possible to achieve the required accuracy with the help of a carpenter's or plumber's large square: the error will be greater than the size of the gap between the door leaf and the door frame.
What to do if the walls are sloped
When checking the verticality of the walls, it may turn out that they have a slope, positive or negative. If the slope does not exceed 5 mm along the height of the door, it can be eliminated on the surface under the casing with plaster. If it’s more, there’s nothing you can do; when sawing additional boards to size, you’ll also have to cut them into a wedge.
Foam blowing
After installing the additions, the cracks are filled with polyurethane foam before plastering. When the foam hardens, it expands and creates quite significant pressure. To prevent this from affecting the finished door frame, you must follow the following rules:
- Do not remove the leveling wedges until the foam has completely hardened.
- Also, do not remove the spacer bars; if they were not previously needed, install them with friction, but not tightly. Spacer strips should support the extensions, and not push them apart.
- Blow in with foam using a uniform movement around the perimeter in 3-4 steps; each subsequent one - after the previous one has completely hardened.
- There should be some space left from the outer edge of the foam to the edge of the slope. If you see the next layer of foam coming out, stop blowing. “Re-plastering” later is better than “blowing out” now.

Immediately with the box
The most technologically simple case is to install door trims yourself when installing a new door along with the door frame. This operation is performed in the following order:
- We place the door jamb on the stools with the inner (opposite to the hinges) side up.
- We align the corners to rectangularity, checking with the diagonals: they should be of equal length. To do this, we temporarily nail to the bottom with small nails a wooden strip with a length equal to the length of the top strip of the door.
- If the jamb does not have a quarter for additional finishing, we select a quarter with a milling machine. The depth of the quarter should be equal to the thickness of the additional board, and its width should be equal to the depth.
Example: additional board – 16 mm thick (standard MDF thickness). You need to choose a quarter 16X16 mm.
- Along the perimeter of the door frame, we attach strips of plywood or drywall to the outside so that they protrude upward to the width of the additional board. A continuous frame is not needed; two scraps are enough for the top bar and 3-4 for the sides. We nail the plywood with nails; The drywall will have to be secured with self-tapping screws.
- We cut the extensions to size. The top trim strip should lie between the side ones, so we cut it to the size of the top quarter, and the side strips to the size of the sides of the box.
- Apply liquid nails or any wood mounting adhesive to both edges of the quarter.
- We insert the additional boards into place and wait for the glue to set.
- We remove the temporary bottom strip that kept the extensions from falling out of the plywood and put the door frame in place.
- Align the box with the base plane.
- We align the box width using wooden spacers; We check the verticality of the sidewalls with a plumb line.
- By knocking wedges under the sidewalls, we achieve horizontality of the upper door strip.
- We fill the cracks with foam and plaster them flush with the wall surface.
- We nail the baseboards, cut them to size and glue the platbands with liquid nails - the door with extensions is ready.
Finished door and straight slopes
In this case, in order to facilitate the installation of the extensions, you need to prepare in advance a dozen or so thin, 3-4 mm thick, wedges from waste plywood. After that:
- We knock the plaster off the slopes and check if there is a quarter on the door frame. If yes, then all that remains is to select additional boards according to thickness.
- We cut the extensions to size, but not in the same way as described above: the top board will now fit the size of the box at the top; side ones - the size of the side quarters.
- We apply liquid nails to the inner edge of the side panels and insert them into place. If you can reach a quarter, it is better to apply glue to it.
- We adjust the height of the extensions using wedges from below, as described.
- We insert one by one spacer strips, pre-cut to the width of the doorway, and support the extensions on the side of the slope with thin wedges so that they do not fall out. We check the verticality of the extensions with a plumb line; better - two at once, suspended in advance.
- Apply glue not to the tops of the side panels, but to the inner edge of the top panel board (or a quarter), and lay the top panel board.
- After the glue hardens, blow it with foam and decorate it as described.

If there is no quarter and with inclined walls
If the door frame is without a quarter, then there are two options:
- Reverse quarter. Using a milling machine, we remove a quarter of the extensions, 10-15 mm wide and half the thickness of the extensions. For “not very” sloping walls, this option is convenient because the quarter of the extension can be made oblique in width, and such extension will hold up no worse than a “normal” one.
- If the walls are brick, then you can knock out a groove in the slope under the door frame and install lining. This option is convenient for those who do rough work with a lot of effort better than light but fine work.
In both cases, the extensions are installed using auxiliary thin wedges, as already described.
Slopes with slope
If the slopes of the doorway are sloping (a widening opening), then, regardless of whether it is a new door or an existing one, the extensions must be installed with the door standing. The fact is that when installing direct extensions, you will end up with a very wide gap. After blowing with foam, there will be a space behind the casing where the plaster lies on the foam. Sooner or later, cracks and/or gaps will form there.
Therefore, before installing extensions in openings with inclined slopes, the inner edge of the extensions must be reduced along the length to a wedge, as marked in the figure with a red circle. After cutting to size, the extensions themselves will take the shape of a trapezoid. Otherwise, the installation of add-ons in this case has no special features.
Interior doors
As a rule, extensions are installed on the side opposite to the door hinges. But when installing interior door extensions, there may be a case when they will have to be installed on the hinge side. If so, then you need to first check whether the additions will not interfere with the opening of the door.
If, when the door is completely open, there remains a gap between its edge and the edge of the door frame equal to the thickness of the trim with a margin of 2-3 mm, there is no problem: we install the trim using any of the methods described above. If the edge of the door is adjacent to the edge of the frame, you need to install backing boards, having first knocked down the plaster from the slopes. This should not be neglected: just 1.5 mm of “pressing” the sash to the door will eat up 10 degrees of its opening angle, not to mention the fact that the door will soon be damaged.
Read about the full cycle of installing an interior door here.
Steel doors
Extensions on steel doors can only be installed as underlays. There is a nuance here: along the length of the extensions, along their inner DECORATIVE side, at a distance of 10-12 mm from the edge, you need to use a circular saw to select a groove with a depth of a third of the thickness of the extension and a width equal to the thickness of the corner from which the door frame is welded plus 1 mm. It is in this groove, when the edge of the steel door frame fits into it, that the frame will hold the extension with itself.
Even more information about the nuances of installing entrance doors can be found at the link.
Stacked accessories
When covering walls with MDF panels, laminate, etc. The door frame can be assembled using pieces of sheathing material, longitudinal or transverse. But technologically, such an operation already relates to the technology of wall cladding, and not the installation of add-ons.
Video: full cycle of installing an interior door
What are extras? Why are they needed when installing interior doors? What types of extensions are there by type of edge and method of fastening? How are extras installed? We will examine these and other questions in detail in this material.
We usually tell clients “If your wall thickness is more than 7 cm, then you will need extensions.” To independently determine whether your doorway needs extensions, you should measure the doorways correctly.
>>>
How to determine the number of extras?
Almost all door manufacturers sell extensions in standard widths - 100, 150 and 200 mm, and the door frame is almost always 70 mm wide. All this means that before installing the extensions, they need to be sawed lengthwise to give them the desired width.
For example, if your wall thickness is 90 mm, then it turns out that you will definitely need an additional 25 mm wide to the box. (about 5 mm is needed to insert the extension into the groove of the box) But extensions of this width are not sold, so we buy an extension 100 mm wide and saw off a 25 mm strip along each edge of the extension.
As a result, we will be left with another strip of extension (middle) 45 mm wide (5 mm was spent on cuts), which, theoretically, can also be used on the top of the box, but in practice this is not done, especially if the extensions have edged edges, i.e. e. the end of the extension has the same coating as the front part of the extension.
The extensions, without edgings, mainly have only veneered doors because... veneer (a thin slice of wood) is an inelastic, brittle material and it is impossible to bend it at a right angle without breaking it. Therefore, almost all veneered panels do not have an edge. Extensions with artificial coatings (Laminate, PVC, Eco-veneer, Laminate) have edged ends. In addition, like door frames or platbands, extensions can also be simple or telescopic.
Types of end additions

Let's return to our example with cutting the extensions with a wall thickness of 90 mm. For this case, you will need 1.5 sticks of extras. From one stick (board) of the extension we make two extensions, sawing it into pieces, and from 0.5 extension we also saw off a piece of the required width and place it on the top of the box.
As a result, it turns out that if our wall thickness is from 70 to 90 mm, then we will not need a full set of extensions (2.5 sticks), but 1.5 sticks with a width of 100 mm will be enough. If the wall thickness is from 90 to 165 mm, then you will need a complete set of extensions - 2.5 sticks with a width of 100 mm.
Table 1: Complete set of extensions for doorways for interior doors. The required number of extensions for each case of doorway wall thickness.
Standard width options
| Wall thickness in mm | 100 cm | 150 cm | 200 cm |
| from 70 to 90 | 1.5 | - | - |
| from 90 to 165 | 2.5 | - | 1.5 |
| from 165 to 215 | - | 2.5 | - |
| from 215 to 265 | - | - | 2.5 |
Telescopic extensions and their features

As mentioned above, extensions come with and without edges. There is also a third type of edge: the end of the extension has a slot. These are telescopic extensions that are designed for installing telescopic platbands.
What features do telescopic extensions have? For example, if the thickness of the wall in the doorway is 800 mm, then there is an opportunity to save: buy doors with telescopic components, and you won’t have to buy additional parts because We will cover the missing 10 mm with a telescopic platband due to the fact that it can be pulled out of the frame groove by 5 mm on each side of the door frame.
Although telescopic moldings cost almost one and a half times more than simple ones, in our case we not only exclude the cost of additional parts, but also the cost of their installation. In addition, if the telescopic extension has to be sawed in half, then attaching it to the box will be more difficult, because you will have to prepare the box for collection, which will also entail additional costs.
Some manufacturers make the extensions one-sided, i.e. cutout for telescopic trim on one side only. When cutting the extension to the required width, this of course makes it easier to attach the extension to the box, but the downside is that such extensions will always have to be purchased in a complete set according to quantity, because They cannot be cut into two parts.
What if the walls are wide?
As a rule, the doorway in brick houses or in a load-bearing wall it can be more than 300 mm thick. In this case, it is better to simpler and cheaper to decorate the doorway to match the wall (paste it with wallpaper or paint it) and not install extensions. The downside is that the unprotected corners of this opening risk rapid damage. Therefore, the extensions are installed throughout the entire opening and decorated with platbands on both sides. There are two ways to solve this problem:
1. Close the end of the doorway with solid panels. Many door manufacturers make wall panels or additional panels. Essentially these are the same extensions about a meter wide. In addition, you can order extensions of the required width, but only in multiples of 100 mm. As a last resort, you can buy wall panels from another manufacturer, selecting them by color.
2. Close the end of the doorway with joined panels. If, for example, the wall thickness is 30 cm, then you can take two sets of extensions 10 and 15 cm wide and join them, filing one of the sets in width. It is especially good to join telescopic extensions using a glazing bead.
INTERIOR DOORS WITH EXTENSIONS >>>Installation of accessories
The extras are installed when assembling the box. First, we assemble the box, and then we attach the extensions cut to the required width to the box using special mounting plates with short self-tapping screws. Thus, the extensions with the door frame become one. This entire structure is mounted in the doorway.
It is not recommended to install the door frame separately, and then the wide extensions separately, because securely fastening the extensions to the frame will be problematic. If you glue it or don’t attach it at all, then over time the panels may come away from the box, forming a gap. Separately, you can install extensions with a width of no more than 50 mm.

