Star news


LED bulbs don't work. DIY LED lamp repair. How to repair an LED lamp
Several years ago, LED lamps deservedly gained popularity almost all over the world. Their strengths in comparison with incandescent or gas-discharge lamps are obvious. Firstly, their service life is several times higher than that of the last two. If an incandescent lamp lasts about one year, and a mercury lamp lasts about four, then the life of an LED lamp can reach more than 10 years. Secondly, the LED lamp significantly saves energy. With the same flow of light energy, it consumes 8 times less electricity than an incandescent lamp, and 2.5 times less than a gas-discharge lamp. In addition, the LED lamp does not use mercury vapor or other harmful substances, so their disposal does not require special equipment.
The only drawback of LED lamps is their price. Despite its constant decline, they are still inaccessible to the majority of the world's population. Like most electronic items, LED bulbs sometimes break. The cause of breakdowns may be poor quality assembly, problems in the power supply, etc. Based on the cost of the lamp, in some cases it is cheaper to repair them yourself than to buy a new one, especially if we are talking about a product with a power of 20 W or higher.
Read on in the article to learn how to repair an LED table lamp with your own hands.
LED lamp device
The LED lamp circuit is quite simple and breakdowns are rare. In order to understand the reasons for the breakdown, it is necessary to understand the principle of operation of this lamp. The usual “Ilyich light bulb” operates on alternating current with a voltage of 220 V. It uses the glow of a tungsten spiral in a vacuum flask. Accordingly, no additional devices are required. In an LED lamp the opposite is true. The LED, which is the direct light source, is powered by direct current with low voltage (approximately 1V). Accordingly, the lamp must contain a device that converts alternating current in constant and reduces voltage.
The ice lamp itself, which needs to be repaired, consists of several parts:
- Base. The bases of LED lamps are no different from halogen or incandescent lamps. The standard cartridge uses an E27 socket.
- Light diffuser. The plastic matte bulb, unlike incandescent lamps, is not soldered to the base, which makes it collapsible.
- Printed circuit board with LEDs. Under the bulb there is a printed circuit board on which several LEDs are located. The brightness of the lamp depends on how many there are and how powerful they are.
- Frame. The lamp body can be made of plastic or ceramic.
- Power board. Expensive lamps are made using transformers to reduce voltage, while cheap lamps are made without transformers, which negatively affects their reliability. Also on the board there are 4 diodes (the so-called diode bridge, which is a rectifier) and a microcontroller in the form of a chip.
DIY tools for repairing feron LED lamps

In order to restore an LED light bulb with your own hands, you need to have a minimum set of tools:
- Multimeter. This device will help check the voltage in the circuit, the presence of breaks, and the operation of the main parts of the circuit.
- Soldering iron (with rosin and solder). Will be needed to replace damaged parts or repair broken circuits.
- Small screwdriver. This tool is required to remove the board from the lamp body.
- Thin stationery knife. Necessary for neatly detaching parts from the printed circuit board.
Do-it-yourself LED lamp repair for 220V

There are only two reasons why the lamp may not light:
- Wiring fault (break contact wire, switch malfunction, lack of contact in the socket).
- The lamp itself is faulty.

Before you start disassembling the lamp itself, you need to rule out the first reason.
The procedure is as follows:
- So, when the switch was turned on, the lamp did not light up. A simple way to check a lamp: screw any other lamp into the socket, regardless of type.
- If the control panel lights up, the problem is in the lamp; if not, you need to look for a problem in the wiring. To do this, use a simple tester that shows the presence of voltage in the circuit. By leaning it against the socket with the switch on, it should show the presence of 220 V on the socket.
- If there is voltage, but the light bulb still does not light, you need to check whether there is contact between it and the socket antennae.
- If there is poor contact between these parts, an arc occurs, which causes carbon deposits to form on the antennae. It needs to be cleaned (of course, turning off the voltage before doing this), and the antennae must be bent. After this, check again with a test lamp.
- If there is no voltage at the contacts of the cartridge, remove it and check for phase presence on the wiring with the switch on. If it is present on the wiring, then the cartridge is changed, otherwise the switch is checked.

When the control light is illuminated, problems with contacts and wiring can be discarded and the LED lamp itself can be directly addressed.
The procedure in this case is as follows:
- Before starting repairs, the lamp must be carefully disassembled. When carrying out work, be sure to remember the disassembly sequence and the location of fasteners. For convenience, you can film the disassembly process on your phone.
- The process of disassembling an LED lamp is quite simple, however, due to the large number of small parts, it requires care.
- The first step is to remove the diffuser. The plastic bulb is attached to the lamp body “in a groove”, and to remove it, just pry it off with a thin screwdriver or knife.
- The next step is to remove the board with the LEDs attached to it. It is screwed to the body with small screws. To completely dismantle the plate, you also need to carefully pry it off with a screwdriver.
- Next, the base is separated from the lamp body. It is pressed around the body and held on by small notches. To separate it, you need to unclench the notches (it is important to do this evenly along the entire circumference of the base). Removing the base itself does not require any effort.
- Then the wiring is separated, which connects the board with LEDs and the power supply.
- The last step is to remove the power supply itself.
- Now the lamp is disassembled and you can begin a visual inspection. The first step is to inspect the circuit for melted or burnt parts. In most cases, they are the cause of lamp failure. If there is one, it must be carefully removed and replaced with a new one.
- If it was not possible to visually find the cause of the breakdown, then a multimeter will come to the rescue to repair the T8 LED lamp with your own hands. This device “rings” each part of the board, after which you can accurately determine which one is faulty.

Once the cause of the failure has been determined, you can begin to resolve it:
- One of the reasons for the lamp not glowing may be a breakdown of one of the LEDs. They also need to be “ringed” by the device. But there is an easier way. You just need to solder two wires to a regular AA battery, and place them alternately against each of the LEDs. A faulty part will not produce a glow. It just needs to be unsoldered and replaced. If it is difficult to find a similar LED, you can simply turn it off from the power circuit. The vast majority of lamps are connected in series. In this case, you can simply close the circuit with some conductor. To do this, a small piece of wire is soldered in place of the burnt out LED. Buying an LED is not a problem now. They are sold on special tapes, from which it can be unsoldered at any time and installed at the workplace.
- A blinking LED light is a clear sign of a faulty capacitor. Therefore, if such symptoms appear, it must be replaced immediately. However, there are often cases when an LED lamp flashes if it is connected to the network through a switch with a built-in LED. They are often used to make it easier to find the switch in the dark. In this case, it should be replaced with a regular model.
- The most common cause of LED lamp failure is one of the capacitors drying out and shorting out. There are two of them in the lamp: the first is 450 V, the second is 100 V. When the first of them is short-circuited, the voltage in the circuit increases critically, which causes one of the LEDs to burn out. lamp from behind high voltage begins to burn brighter, but not for long. Usually, after one of the LEDs “fails,” the voltage on the second capacitor reaches 300-330 V, which causes it to fail. After this happens, two resistors fail due to high voltage, completely breaking the circuit. By ringing each of the elements, you can find the fault and replace it.
- Chinese manufacturers are especially guilty of low-quality capacitors. For the lamp to work long and efficiently, the voltage on the first capacitor must be at least 240 V, because the voltage on LEDs is usually up to 180 V. In this case, it is better to install a larger capacitor, or connect another one in parallel, thereby achieving a similar result .
- The driver (chip) of an LED lamp most rarely fails. Do-it-yourself repair of the LED lamp driver is not carried out; it is replaced with a similar one. The driver model, depending on the lamp parameter, can be found in the special tables of their manufacturers.
- If you have problems with soldering the part (lack of experience or materials), you can buy a ready-made light bulb board. Replacing it will be much cheaper than buying a new lamp.
DIY Chinese LED lamp repair: photo


DIY LED lamp repair: video
Recently, new types of lamps with very high luminescence quality have become extremely popular. These are LED or, as they are also called, LED lamps. In a relatively short period of time, this technology has replaced other analogues of lighting products, such as fluorescent, halogen and other types of lamps.
This circumstance is understandable, because LED technology itself has high operating life and service life, which is one of the main quality indicators for lamps. But no one is immune from possible breakdowns and problems in the operation of LED lamps, just like any other. Therefore, it will not be superfluous to know exactly how to repair LED lamps with your own hands.
Device of LED lamps
In order for the repair to be completed successfully, it is necessary to understand the very structure of such LED lamps, the components and components that are included in it. It is quite obvious that good glow quality indicators were achieved thanks to the high manufacturability of the original product.
LED lamp device:
- the lamp body itself, which usually differs in its original structure and design;
- lamp drivers acting as a power converter;
- light source (LED elements);
- various radiators;
- optical elements.
If we consider in more detail each element of the LED lamp circuit, then we need to pay attention to the filling itself, because The lamp body is not of particular interest for understanding the operating principle of such a lamp.
So, the drivers, acting as a power supply for the diodes, do not generate the voltage itself, but directly the direct current itself with a standard power of 220 Volts. LED elements, which are the source of light in such lamps, produce it by converting the energy received from the driver.
 Sectional design of an LED light bulb
 The radiator acts as a cooling element to prevent the lamp device from overheating. Optical elements, also included in the structure of the lamp, transform the glow of the LEDs in such a way that this radiation is acceptable to the human eye.
The description of this circuit was taken as an example from one of the cheap Chinese 220V analogues, but the structure of such lamps is almost the same, only the manufacturers are different.
LED lamp disassembly process
This stage of work is completely obvious, because not a single repair of any equipment can be done without this procedure. However, this fact is quite controversial with regard to disassembling household lamps, but in the case of LED lamps, this is quite justified. There are two methods that can be used to disassemble LED lamp with your own hands:
- In the first case, you will need an ordinary flathead screwdriver. This method will be appropriate when disassembling a lamp where there are ribs for dissipating thermal energy, because it is enough to insert the tip of a screwdriver between the ribs and then carefully separate the body. Caution in this matter is extremely important, because inept manipulations can damage the internal components of the device.
- The second method is suitable for lamps with thick glass. It is worth noting that the structure of such lamps does not involve disassembling the body as such, but there is one little secret. You need to take a hairdryer and heat the lamp body with a stream of air, after which the glass will come out of the “socket” without any obstacles. This is achieved due to the warm effect of air, as a result of which the adhesive composition connecting the lamp body becomes more elastic, and the body itself expands slightly.

Replacing the power supply
One of the most common failures in an LED lamp is the failure of the power supply, in which a resistor or capacitor can burn out. Having disassembled the lamp body, you need to check the functionality of this unit by connecting it to a 220 Volt alternating current network. You can, of course, use measuring instruments to find out whether there is voltage on the board, but they very often do not show this information.
If it turns out that the problem is with the power supply, then the only way out of the situation is to replace it with a new one. Do-it-yourself repairs, in this case, are practically impossible, because this will require special equipment that simply cannot be found in an ordinary apartment.
You should look for a power supply in various electronics stores, because it may not be available at regular points of sale of electrical goods. You need to purchase a standard 5W power supply. Then the power supply itself is replaced, which is a fairly simple matter for a person with at least a little knowledge of electronics.
What to do if the problem is in the LED
If your power supply is fine, then it makes sense to check the LED elements. Do you need to find out which diode has failed? To do this, take a 9V battery and a resistor with a resistance of 1 kOhm, with which we check each diode separately.
LED lamp wiring diagram
Having detected a failed diode, it is necessary to short-circuit its outputs. If we take into account that the connection of the diodes is made according to the chain principle, then shorting one of them will not lead to the loss of glow by the other diodes. Next, you can’t do without a soldering iron, with which you can solder off the non-working LED elements, and install new diodes in their place using the same soldering iron.
Corn lamp repair
This type of LED lamp is most suitable for various repair work. The fact is that in such lamps all LED elements are located on the very surface of the body, which makes it possible to avoid the process of disassembling this lamp.
It is worth noting that this lamp operates on standard 220V. If a problem occurs, the diodes can be ringed and, if necessary, replaced with new ones. You can do without replacing a failed element by covering it with a jumper, which will not in any way affect the performance of the entire structure. However, the appearance of the lamp will be spoiled, and the absence of one or more LED elements will be noticeable to the eye.
Driver problems
In general, this element is one of the most reliable in the entire structure of the LED lamp. Very often there are cases when the entire filling of the lamp became unusable, but the driver remained operational. There is still no definite opinion as to why the driver fails, but there is an assumption that this is due to a mismatch of certain operating indicators.
You can identify a problem with the driver by one sure sign - one or more LED elements are blinking. In this case, the lamp does not stop emitting a glow, but this sign already indicates that a violation of the interaction circuit with the converter has been detected. If this happens, then the only thing that can help is replacing the driver with a new one, which can be purchased on the radio components market by selecting it according to the markings on the lamp.
Positive aspects during the renovation process
The breakdown of a lamp is, of course, a certain nuisance for its owner, but some benefits can be identified from this. Having tried to repair the lamp with his own hands, a person begins to understand this issue, trying to fix this problem on his own, without resorting to the help of specialists. Thus, a person educates himself and achieves some success in a new field. But there is also a more practical benefit from repairing LED lamps - this is the opportunity to modernize and improve their characteristics.
The fact is that the circuits of some designs of LED lamps are not entirely suitable for the factory diodes installed on its board. This may affect the quality of the lamp's glow, which will certainly be, but not as bright as may be stated in the technical data. Therefore, it makes sense to experiment a little by trying to replace them with new diodes.
In addition, the circuits of some 220 Volt lamps, especially for manufacturers from China, may not be complete, due to the fact that it may lack a rectifier and capacitor. This leads to constant flickering and blinking of the lamp, which has a very negative effect on the human eye. Therefore, at home it is quite possible to install the missing elements with your own hands, achieving better radiation.
LED technology is by far the most modern for use in lighting technology. However, a number of technological nuances that should give such lamps more stable operation have not yet been worked out.
The design of these lamps is quite complex; it includes a considerable number of components that are at risk of failure.
This fact significantly complicates the DIY repair process, because its implementation requires a certain amount of technical knowledge. These include basic skills in working with a soldering iron, knowledge of radio engineering, and knowledge of the basics of electrical engineering. In addition to this, you have to purchase relatively expensive components to replace failed elements.
Of course, this cannot please the average consumer, but the complex repair process is justified by the high technology of the LED lamp itself. If you do not save on purchases, but purchase products from well-known manufacturers, then, quite possibly, the issue of repairs will not arise for a very long time.
The price of LED lamps is quite high. Therefore, if your lamp has just such lamps and one of them stops working, then do not rush to throw it away. In this article we will tell you how you can repair an LED lamp yourself.
Most LED lamps are made in China, and their quality often leaves much to be desired. According to statistics, two out of five LED lamps stop working within the first year of operation. Having bought three light bulbs, you should be prepared for the fact that one of them will burn out within the next year.
LED bulbs burn out differently than incandescent bulbs. If incandescent lamps simply stop giving light, then often the tungsten filament in them simply burns out. LED light bulbs burn out differently. They begin to make cracking sounds or smoke heavily (both options are possible at once), which is often followed by a strong crackling or popping noise and the lamp stops working altogether.
But in fact, in an LED lamp, some of its elements often simply fail, which can be eliminated with simple manipulations with a soldering iron. In order to fix this problem with your own hands, you need to unscrew the LED light bulb.


Very often, the problem that causes LED light bulbs to stop working is burnt-out LEDs. They burn mainly due to incorrect or poor-quality installation. Burnt out LEDs can be replaced and in eighty percent of cases the LED light bulb will be usable again.

Also, after opening, we check whether the capacitor is damaged. During voltage surges, it is this that can cause the LED lamp to fail. To check whether everything is in order with the capacitor, simply remove the printed circuit board from the box of the LED lamp itself.

The photo shows that the capacitor did not just swell, but it exploded. The pop before the LED light stopped working was the sound of a burst capacitor. A broken capacitor will have to be replaced with a similar one.

Finding such a capacitor in radio parts stores will not be difficult. It is advisable to find a completely identical one.

After purchasing all the necessary parts, you can begin repairing the LED lamp. First, use a soldering iron to unsolder the burnt-out LED.

This is what a sealed LED looks like:

If you are unable to find the LEDs you need, you can simply short-circuit the contacts directly. To do this, use solder and a soldering iron.

The shorted contacts should look something like this:

Our next step will be to install a new capacitor. To do this, using a soldering iron and solder, install the new capacitor in place.
![]()
After the capacitor is soldered, the LED light bulb needs to be assembled. To do this, we install the printed circuit board back into the housing of the LED lamp, and cover it with a light-diffusing cap on top.

We turn on the switch and the LED light works again.

Now, dear readers, you have learned how to repair LED light bulbs with your own hands.
Due to the high cost of an LED lamp, throwing it away after it breaks is not a good idea. It's a shame if it breaks the next day after the warranty expires. This article is especially relevant for those who have relatively new light bulbs, the brightness of which has not yet decreased after a short time of operation.
To determine the cause of the breakdown and carry out even light repairs of LED lamps with your own hands, you need to have enough knowledge about their structure and operating principle. Practice shows that most models break down for trivial reasons; they can be fixed at home, even without sufficient experience in lighting technology.
Briefly about the device and principle of operation
A standard LED lamp consists of the following elements:
- The base is screwed into the socket and has contacts for supplying electric current.
- Driver is a device for adjusting voltage, controlling overheating, rectifying alternating current into direct current, ensuring operation of an LED lamp in a certain voltage range.
- Radiator - cooling powerful LEDs in branded household and industrial light bulbs.
- LEDs are semiconductor crystals that glow when a direct current passes in one direction. Alternating current without a driver is destructive for them.
- Reflector and diffuser are devices that help distribute light evenly and efficiently at the maximum angle (or specially specified for special types of light bulbs).
The principle of operation is very simple: alternating current is supplied from the network through contacts to the driver, where it is rectified and sent to the LEDs. Excess heat is removed using a radiator or board on which the LEDs are located.
Despite the huge variety of LED lamps that have found application in all areas of modern life, their structure is identical and differs only visually. IN LED lamps a transformer is present (sometimes in addition to the driver, and sometimes instead of it).
More details about the purpose of each element and the principle of operation can be found in a separate article devoted specifically to these issues.
Pre-check
How to repair an LED lamp? If it doesn’t shine, then you shouldn’t immediately rush to disassemble it. First, you should still look for the box with the guarantee - what if today is the last day? Then change it urgently. If the warranty period has expired, then:
- Arm yourself with a voltmeter or multimeter; first you need to check the voltage in the apartment or house itself. It's all about the principle of operation of the LED light bulb driver. As mentioned above, it determines the operation of LEDs. The standard parameters are the range of 170–260 volts. However, this range is not respected by unscrupulous manufacturers and nameless “Chinese”, reducing it to 190–240. When these parameters are reached, the driver will turn off the LEDs so that low or high current does not damage them. Therefore, it makes sense to check the voltage in the house; if it differs from the norm of 220 V by 20–30 volts in any direction, put the light bulb aside for a while. Check it early in the morning, when everyone is sleeping; neither the residents of your house nor the neighbors are using electrical appliances (check the voltage again first). Maybe, with normal parameters, the light bulb will shine as if nothing had happened.
- The second most common case is the breakdown of a chandelier or lamp. To do this, screw the light bulb suspected of breaking into the place where the lamp definitely works. To complete the experiment, screw in a guaranteed working light bulb in place of the old one. If a “broken” light bulb lights up in a new place, but a working one does not want to light up in the old one, the conclusion is obvious. If all the light bulbs retained their properties when changing places, we move on.

- We check the integrity of the fuses, especially if the meter is old. Damaged or blown fuses can compromise the integrity of the network, causing parts of the network to stop working. This is especially true if there is a suspicion that the lamp is broken. Check all switches, toggle switches, fuses, sockets and switches near the chandelier - nothing has burned out or shorted anywhere. We replace everything that is out of order.
- Now you should divide lighting fixtures into two categories - LED and those into which LED bulbs are screwed. Let's talk about repairing LED lamps.
- Their structure is very similar to a light bulb, only larger in scope. LED chandeliers are a series of LEDs connected in series. Their light is controlled by a power supply. Turn off the power to the apartment, remove the panel, test it with a multimeter. Perhaps the problem is in the power supply - a common problem with such chandeliers. It is not difficult to find it on radio markets. If the replacement does not help, then we move on to contacts. We clean them with a cotton swab and alcohol, check and resolder the wires if necessary. If this does not help, the problem is in the LEDs. They are connected in series, if one burns out, they all go out. The complexity of sorting through them tends to infinity as the number of LEDs in the circuit increases (more than 6 pieces), so it can be easier to perform a mass replacement of LEDs, all at once (buy high-quality elements, for example, Online). Such a radical measure will definitely correct the problem - the only better solution is to buy a new chandelier.

- There are similar measures in a regular chandelier: ring the bell, check the contacts, clean the sockets. If this does not help, we replace the cartridges and wires with new ones. Before doing this, use the device to make sure that current is supplied to the chandelier. Such radical measures will definitely put the chandelier in order. Does the lamp still not want to light up? But they did preventive maintenance on the lamp.
At the current stage, we have made sure that the problem is a malfunction of the LEDs in the light bulb, so now we are starting to diagnose and prevent it. What can be done to repair burnt out lamps?
LED light bulb repair
- To begin repairing an LED lamp, you should try to disassemble it. Unfortunately, not all samples have a dismountable case; some, made in China, are disposable - their case is soldered together at the factory, and disassembly without damaging the internal components is impossible. Don't waste your time, they are not that expensive to try to fix them yourself. But if you're interested, you can try it. Usually you should start with the base or diffuser; they are weaker than the main body, but they also hide the most important elements of the light bulb - the driver and the LED block, respectively.
- We begin repairing the LED driver - we call it. You should start with it because it is the first one in line to supply current to the LED. The driver is a complex structure containing many elements, so we arm ourselves with a good table lamp and a magnifying glass if necessary. We check capacitors, resistors, cables. This is a delicate matter - even visually intact elements may have an open circuit inside, so you will have to check everything. In most light bulbs, capacitors and resistors are soldered on top, so they can be replaced with new ones (check them before installing too, so as not to do extra work). If there is another disassembled light bulb with similar parameters, you can test the driver on it. If it doesn’t work, it’s easier to buy a new light bulb; if it works, the repair was successful, we move on.
It should be noted that it is in this way that the modification of Chinese chandeliers and Chinese LED light bulbs, including corn lamps.
- We look through all the paths of the circuit from the driver to the LED, for prevention we wipe it with a cotton swab slightly moistened with alcohol - this will definitely not harm 220 V LED lamps.

- Using a digital multimeter we test the LEDs. Further actions depend on the type of crystals. If it is one crystal with a lens, soldered into a chip, you will have to desolder the entire chip; faults in LED elements of this type are almost impossible to repair at home (to desolder it, you will have to stock up on a soldering iron with a very thin tip). If the SMD diodes burn out (and most likely, they are the ones installed in the light bulb), then they can be easily unsoldered and replaced with new ones (before installation, do not forget to check them with a multimeter so as not to accidentally install burnt-out crystals).
- At this stage, the light bulb should work, since all important components have been checked. If it doesn’t work, double-check everything again, maybe some cable hasn’t been wiped. It still doesn’t work - throw it in the trash with a clear conscience. If everything is in order, welcome to the world of live electrical engineering, enjoy your use.
LED light blinking
The question is included in a separate paragraph, because this problem is often encountered in everyday life, and many do not know how to fix an LED lamp in this case. Moreover, there are two types of blinking:
- When turned off, the light flashes brightly, the frequency varies - from once per second to several times per minute, or even per hour. Even the replaced lamp continues to blink at this point. There may be cases when in the dark it is barely noticeable and lights up weakly - this also leads to the LEDs gradually burning out, and repairs are necessary.
- When turned on, it periodically goes out for a second or even a few minutes, then lights up again.
The first case occurs due to the presence of a switch with an indicator. Its operation is ensured by the flow of a small current through a weak diode, so it glows. This current continues its path into the chandelier, charging the capacitor in the light bulbs. When sufficient charge has accumulated, the driver tries to start the glow, but it stops immediately after the capacitor discharges. Is it possible to solve this problem at home? In such a situation, you need to use a resistor connected in parallel between the switch and the light bulb, which extinguishes the weak current. An incandescent lamp is used as an additional load in the same circuit; a miniature version of literally 10 W is enough. You can also change the switch to a version without an indicator.
It happens that blinking is observed even with a regular switch. This is caused by incorrect connection of the contacts - the phase is supplied to the light bulb constantly, and the zero opens. It will be correct if the switch opens the phase and the zero is constant. In a modern 220-volt lamp (for example, Gauss), the LEDs are protected from such influence by installed resistors.
If the lamps periodically turn off during operation, this can be caused by two reasons: a constantly changing voltage in the network or a fault in the contacts. The first problem can be solved by stabilizing the voltage using appropriate devices or replacing the light bulb with one that has a larger operating range. The second - in the manner described in the repair point for LED lamps (testing and wiping contacts, resoldering damaged resistors and capacitors).
Conclusion
Repairing LED lamps can most often be done at home. For this it is enough to have digital multimeter, soldering iron, cotton swabs and alcohol. A thorough inspection of all important components and elements will allow you to identify the problem the first time, and careful work will allow you to restore the damaged areas. The main thing is not to throw away the light bulb at the first sign of a breakdown; most often the damage is so simple that fixing it can be done with your own hands and will take very little time. And buying high-quality lamps (for example, Gauss) will give you a guarantee from the manufacturer.
When an electric incandescent lamp fails, it can be used for various crafts. To do this, you need to know how to disassemble a light bulb. The tools used are thin-nose pliers and a screwdriver. You will definitely need gloves to protect your hands from cuts. The components of the lamp are shown in the photo below.
What does a disassembled lamp look like?
The lamp consists of electrodes with a spiral, a glass bottle and a base (in the photo - from left to right). The spiral is fixed on electrodes, one of which is connected by soldering to the base sleeve, and the other to its central contact. There is insulating glass between the sleeve and the contact. When assembling the lamp, the sleeve is filled with inert gas so that the spiral does not quickly oxidize or burn out.
Luminescent and energy-saving lamps contain poisonous mercury vapor inside, you need to work with them carefully so as not to damage the flask.
Disassembling the lamp
An ordinary incandescent lamp can be easily disassembled and contains no harmful substances. This is done as follows:
- You need to grab the soldered contact at the bottom with thin-nose pliers, loosen it and turn it until the two wires leading to the filament body break, then remove the contact.
- Use thin-nose pliers to carefully crack the base insulator. This is done carefully as it is made of thick glass.
- The remaining inner part of the light bulb (the "leg") is loosened and removed. The “leg” is made of glass, which should be handled with care. Together with it, the filament body, electrodes and hooks are removed. Then the inside of the light bulb is cleaned with a cloth.

Removing the “leg” of an incandescent lamp from the bulb
The work involves glass, so it is done over a box or laid sheets of paper.
The result is an original container made of heat-resistant glass, which can be used for the following crafts:
- fill the inside with water and lower the stems of small plants, such as flowers, into it;
- pour a flammable liquid into the bottom, lower the wick into it and use the light bulb as a source of light or heat;
- glue the light bulbs together and secure them like a lampshade around an electric light source;
- place a beautiful craft inside the light bulb, for example, a sailboat;
- pour earth into the bottom of the flask and plant a small plant;
- use as a miniature aquarium;
- make a small container for storing spices and choose a suitable lid that should fit the base.
If the metal base is not needed, it can be carefully broken off by first scratching the junction with the bulb with a glass cutter or diamond file. You can dip the base in hydrofluoric acid or a mixture of hydrochloric acid and ammonium nitrate. After the metal dissolves, only the glass part will remain. You can also bend the base at the point of contact with the glass, and then crumble the glue and remove the bulb. An old incandescent lamp does not have a very strong connection, which makes it easier to separate the base.
Disassembling the lamp with socket
When unscrewing the lamp from the socket, it may break or separate without a base. To disassemble the cartridge, you need to do the following:
- Wear gloves and goggles to protect against glass fragments. If the lamp is located high, you should wear a hat.
- The electricity is turned off and the indicator checks the absence of voltage. The light bulb can be connected with a switch on the neutral wire, and not on the phase. In the electrical panel, the circuit breaker is turned off, through which power is supplied to the lighting line (the light bulb also belongs to it).
- Next, you need to use a dustpan and a broom to collect the fragments from the floor and throw them in the trash. If there are remains of glass on the base, thick paper or cardboard should be laid underneath.
- The base is unscrewed with pointed pliers counterclockwise. If it does not give in, it must be loosened by rotating in both directions. You can try to unscrew the cartridge by rotating it counterclockwise. If this succeeds, it will not be difficult to unscrew the base in the future. If it does not unscrew by the edges, you should spread the pliers and, with emphasis on the inner walls of the base, unscrew it. The edges of the base can be bent inward with a flat screwdriver. Then you can better grip them with pliers when unscrewing them. The socket contacts lose elasticity over time and become deformed when the lamp is screwed in. They need to be constantly bent when replacing lamps.
A compact fluorescent lamp consists of a lamp with an electronic ballast built into the housing in the base area. The lamp must not be disassembled as it contains toxic mercury vapor, and the trigger device can be accessed for repairs. To do this, use a flat, wide screwdriver to unfasten the latches one by one, as shown in the figure below.

Compact disassembly process fluorescent lamp
Old lamps are difficult to disassemble, since the plastic becomes hard from prolonged heating and the latches break. They can be cut off by running a sharp blade along the seam several times, and then open the halves. In the future they will have to be glued together. Disassembly will be easier if you heat the case with a hair dryer.
Inside is electronic ballast, connected to the base contacts by short wires.

How does a compact fluorescent lamp work?
First of all, a multimeter is used to check the serviceability of the filaments indicated on the board A1-A2 and B1-B2. Their resistance is 9-10 ohms. If a break in the spiral is detected, it is shunted with a resistor with a power of at least 1 W and with the same resistance. This removes the diode that shunts the filament.
Sometimes there is a fuse in the control circuit. If it burns out, a resistor of several ohms is installed instead.
If the threads are in good condition, the condition of the board is checked: the presence of damage, burnt elements and the quality of soldering. Then the serviceability of the parts is determined. Most often, a breakdown of transistors or a resonant capacitor occurs. The following may fail: input limiting resistor, electrolytic capacitor, rectifier diodes.
The lamps burn out mainly during startup. Therefore, their durability is determined by the number of inclusions.
If both filaments burn out, the lamp can be recycled, and a working electronic board can be used to power a tubular fluorescent lamp, if it is suitable for power.
You can extend the life of the CFL if you drill small holes around the perimeter of the case for ventilation (one row near the base and one in the middle).
Disassembling the LED lamp
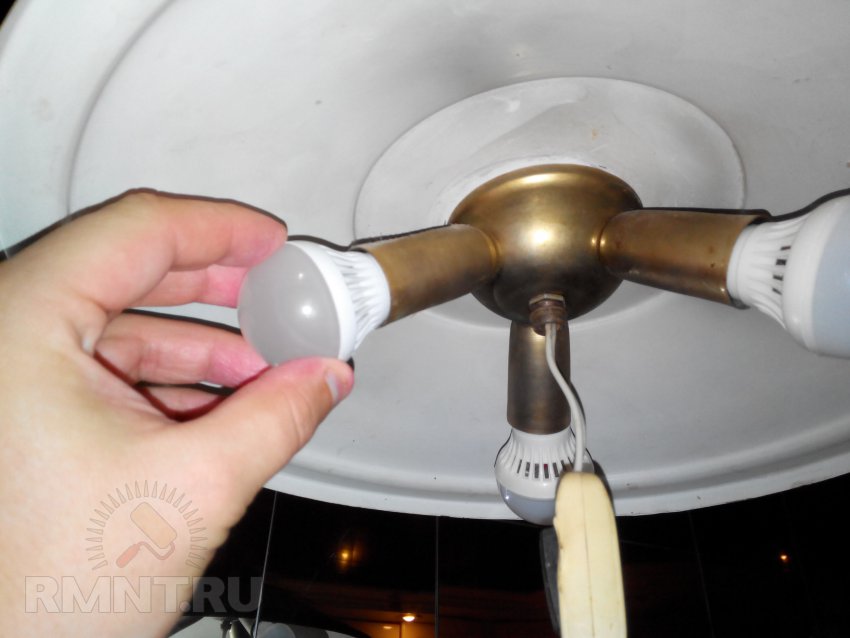
LED lamps are disassembled for repair purposes. To do this, you do not need to have extensive knowledge in the field of electronics. First of all, check the voltage supply to the contacts of the socket into which the lamp is screwed. If there is power, but it does not light up, then the problem is in the lamp. A simple way to check is to screw a working lamp into the socket. To test the circuit, the type of lamp is not important.
Structure of an LED lamp
- frame;
- base;
- light diffuser;
- LED block;
- driver.
The housing does not require tightness and the presence of a gaseous environment inside, although models that are completely similar in appearance to incandescent lamps have now become popular.
The lamp bulb is made of glass or plastic. At the top there is a plastic light diffuser.
The sockets used are the same as for incandescent lamps: E27 and E14. Foreign models have an E26 base and are often designed for a voltage of 110 V.
The block consists of several groups of LEDs, which are soldered onto textolite or aluminum boards. Each lamp is connected in series.
Drivers are power supplies that convert the input voltage to the optimal voltage for groups of LEDs. Transformer power supply circuits are common. Drivers can be built into the case or implemented as a separate unit.
Damage detection
The light-diffusing dome is arranged on latches, which can be unhooked to gain access to the interior. It can be attached to the body with screws that must be unscrewed.

LED lamp disassembled
After disassembly, the lamp power circuit is checked for external damage. If no burnt parts are found, they are checked using a multimeter.
Burnout can be seen on the LEDs. In this case, they must be replaced. The remaining parts are also called, and the faulty ones are replaced. It is recommended to replace the current-limiting capacitor with another one whose operating voltage is 400 V. If it is designed for 220 V, it may fail. When it is not possible to find a suitable LED, a 0.25 W resistor is connected instead, and the value depends on the power of the lamp.
Assembling the LED lamp is done in the reverse order.
LED lamp from incandescent lamp
- Remove the solder on the bottom contact of the incandescent lamp base by melting it with a soldering iron.
- Use needle nose pliers to break the black glass that serves as insulation.
- Use a screwdriver to remove the glass stem and remove everything from the lamp. Enlarge the hole as much as possible.
- Solder a circuit of three LEDs by connecting them in parallel and adding a 56 Ohm resistor to each. The resistor is soldered to the “+” of the LED (Fig. below a). The resistance value may vary as it depends on the power source.
- Solder two insulated voltage supply wires to the circuit.
- Insert the resulting structure into the hole in the base and carefully unfold it inside the light bulb so that the wires do not short-circuit with each other.
- Remove the power wires from the hole in the base.
- Check the serviceability of the light bulb by connecting it to the source DC voltage(Fig. b).
- Fill the base inside with hot glue using a gun and let it harden.

Making an LED lamp with your own hands
This way you can make a cheap and economical LED lamp, because the cost of the finished model is high, and low-quality products are often found.
Let's disassemble the lamp. Video
The answer to the question of how to disassemble a light bulb correctly can be obtained by watching this video.
An incandescent lamp can be easily disassembled; many crafts can be made from it, but it is impossible to use the lamp for its intended purpose. You can only restore electronic devices control of CFL and LED lamps located inside the base.

